Showing posts with label debian wheezy. Show all posts

07 June 2012

180. Temporary fix for supertuxkart

I don't often play games, but I noticed that supertuxkart had been updated in debian wheezy and having a little bit of free time I figured I'd give it a whirl.

 supertuxkart 
supertuxkart: error while loading shared libraries: libIrrlicht.so.1.7a.3: cannot open shared object file: No such file or directory

Make sure that libirrlicht1.7a is installed.
sudo apt-get install libirrlicht1.7a

Then
cd /usr/lib
sudo ln -s libIrrlicht.so.1.7a.2 libIrrlicht.so.1.7a.3

It's obviously not a permanent fix, but I haven't had any problems playing.

05 May 2012

138. Compile ATLAS blas on debian testing

I first tried the latest stable and gave up due to "ERROR 639 DURING CACHE EDGE DETECTION!!" errors. Hence, I used unstable.

Start here

mkdir /opt/ATLAS
chown ${USER}  /opt/ATLAS
mkdir ~/tmp
cd ~/tmp
 wget http://downloads.sourceforge.net/project/math-atlas/Developer%20%28unstable%29/3.9.72/atlas3.9.72.tar.bz2


tar xvf atlas3.9.72.tar.bz2
cd ATLAS/


Edit ATLAS/Make.top 
change the V on line 6 to lowercase i.e. from
- $(ICC) -V 2>&1  >> bin/INSTALL_LOG/ERROR.LOG
to
- $(ICC) -v 2>&1  >> bin/INSTALL_LOG/ERROR.LOG

mkdir build/
cd build/
sudo apt-get install cpufrequtils

Since I don't like computers overheating I normally throttle my cpu. To unset throttling on a AMD64 (phenom II) six core system, before compile:
/usr/bin/cpufreq-selector -g performance
sudo cp /sys/devices/system/cpu/cpu0/cpufreq/scaling_governor /sys/devices/system/cpu/cpu1/cpufreq/scaling_governor

sudo cp /sys/devices/system/cpu/cpu0/cpufreq/scaling_governor /sys/devices/system/cpu/cpu2/cpufreq/scaling_governor
sudo cp /sys/devices/system/cpu/cpu0/cpufreq/scaling_governor /sys/devices/system/cpu/cpu3/cpufreq/scaling_governor
sudo cp /sys/devices/system/cpu/cpu0/cpufreq/scaling_governor /sys/devices/system/cpu/cpu4/cpufreq/scaling_governor
sudo cp /sys/devices/system/cpu/cpu0/cpufreq/scaling_governor /sys/devices/system/cpu/cpu5/cpufreq/scaling_governor

Alternatively, you can disable throttle checking using the -Si cputhrchk 0 configure switch. If you don't, and throttling is on, configure will fail.

OK, continuing with the build, in your build/ directory:

.././configure --prefix=/opt/ATLAS -A AMD64

Before you continue, do
make xprint_enums ; ./xprint_enums
and study the output -- you might find a better ARCH fit than e.g. AMD64.  If so, run the configure command above again. There is a lot of other options which you can configure as well. Obviously, nothing prevents you from experimenting and re-compiling if something goes wrong. You can also run without any -A switch at all.

Continuing:
make
make install
cp lib/lib* /opt/ATLAS/lib

Your libs should be in /opt/ATLAS/lib -- when you compiled something to include the new libs, use
"-L/opt/ATLAS/lib"

04 May 2012

134. Introducing a CA certificate in debian

So, for some reason you've been issued a CA certificate. Now what?

I've presumed that you've somehow downloaded both the root certificate (cacert.crt) and your personal certificate (usercert.pem). You'll need both.


Openssl

Convert to .p12
openssl pkcs12 -export -in usercert.pem -inkey userkey.pem -out usercert.p12

Verify
You can verify your issued certificate, e.g.
openssl verify  -CAfile ~/Downloads/cacert.crt ~/.globus/usercert.pem


Browsers:

Iceweasel/Firefox 
Go to Edit, Preferences, Advanced, Encryption: View certificates. Click import under Your Certificates and select your usercert.p12 (see above for conversion).  Got to servers, import cacert.crt.

Make sure that your cert authority shows up under the authority tab (otherwise try importing cacert.crt). Highlight the relevant authority, and click on edit trust: select the relevant fields of identification (e.g. website and/or email).


Chrome/Chromium
Click on the spanner icon, go to Settings, Under the bonnet, Manage Certificates and select Import under Your Certificates. Click on server, import the cacert.crt. Approve the certificate authority for the intended uses of the certificate. If you did it already in firefox it may have carried over.


Email:

Evolution
First go to Edit, Preferences, scroll down to Certificates and import your certificate and, under authorities, import the root certificate (cacert.crt).

Under the Authorities tab, select the issuing authority, click on edit and set the trust level (probably all)


Next, go to Edit, Preferences, Mail Accounts, Select an account and click on Edit. Select the Security tab


Repeat this for all accounts you want to use this certificate with.

Test it:


Send it. Receive it.

If all is correct, this is what greets you

If you don't add the certificate authority as being trusted -- and this will be the case for some of your recipients, this is what you see. Signature no good.


Thunderbird
Go to Edit, Account Settings... and under each account click on Security, then on View Certificates -- import your certificate and the issuing authority's certificate here, or you won't be able to Select the certificates under Digital Signing and Encryption.

Also, under View Certificates, highlight the certificate authority and select Edit Trust -- click on Edit CA trust, select website, mail etc., then select I do trust...
I presume that you do trust the authority or this is an exercise in futility.
You need to do this for ALL accounts that you intend to use, or you'll run into trust issues.

You can select/de-select signing when composing using the S/MIME menu.

If all goes well, users which also have the same certificate authority listed as trusted (probably not the case, but whatever) will see a sealed envelope (this message has been signed by pgp as well as S/MIME:

02 May 2012

128. Encrypting your email, chat and VOIP in linux (Debian Wheezy)

I'll show how to use GnuPG with Gajim, mcabber, Evolution, Thunderbird and Mutt below
.
I'll also show SRTP/ZRTP using Twinkle with iinet for encrypted VOIP calls -- this solution should work computer-to-computer, but not from computer to phone and vice versa.

You may also want to look at truecrypt (http://verahill.blogspot.com.au/2012/04/using-truecrypt-with-dropbox.html) to secure your files and/or devices, in particular portable storage media like USB sticks. Truecrypt is a good way of backing up or managing your pgp/gpg keys.

I do recognise that there's a lot of info on this page, so don't feel shy about using 'search' to get to where you want to be.

Why?
If you have nothing to hide, why worry?

University and company email systems get hacked. What you do and say can come back to haunt you in unintended way. A lot of employers in the US are scared of submitting honest letters of recommendation because they fear getting sued if they are not favourable enough. Politicians are, often illegally, using private email for official business.

On the one hand, if something doesn't pass the 'newspaper test' (how would you feel if this was the headline on today's newspaper?) maybe you shouldn't be doing/writing/saying that.

On the other hand, in particular in academia, it is important that discourse can be direct and honest.

For these reasons I favour using PGP/GPG encryption as much as possible, since I feel that it strikes a good balance between the need for privacy and unfettered discourse, and the need for a paper trail. PGP/GPG encrypts the content of your conversation, but still leaves it open with whom you converse, thus providing a trail ensuring  that you don't get involved in something which you shouldn't.

In some jurisdictions this means that you can be ordered to decrypt your conversation, while, to my understanding, in e.g. the US the content and relevance of the conversation needs to be known to some extent for this to happen. The bottom line is that you will be involved in the release of the material, and that it will take a court order for that to happen.

As with everything else, encryption is just a tool, and it can be used responsibly for good purposes, or irresponsibly with bad intent.

And if even you truly don't have anything to hide, you may support the right for each citizen to decide for themselves whether they want to use encryption or not. The view of law enforcement in many countries seems to be that only criminals have reasons to use encrypted communication, while at the same time security/intelligence agencies believe that their job becomes more difficult to do if they can't sniff all traffic (e.g. ECHELON).  These are legitimate opinions, but as with everything you have to make a choice between how much liberty you are willing to sacrifice for a little bit of security. You have to decide for yourself where you draw that line.

Enough meaningless banter, time to get configured.

1. IMPORTANT

The key KEY principle is that:
1. the PUBLIC key ENCRYPTS
2. the PRIVATE key DECRYPTS.

You can encrypt with a private key (e.g. signing), but then anyone with your public key can decrypt it.

I'll write this in bold because it is central to encryption with public and private keys:
use the recipients PUBLIC key to encrypt correspondence to them, and they should use your public key to encrypt correspondence to you. If a private key is used to encrypt, everyone can read the correspondence.

IF, on receiving an encrypted email from someone else, you have to go online to download their key to decrypt, then they used their private key and not your public key to encrypt. That is wrong and INSECURE.

A side effect is that,UNLESS you cc and encrypt to yourself using your public keys when emailing, you WILL NOT BE ABLE TO READ SENT EMAILS which have been encrypted using someone else's public key.

In a more formal setting you will probably want to use expiring keys. For personal use, keys that don't expire are probably fine.


2. How?


2a. Keys and key-management

First install seahorse, gnupg, and gnupg2.

Regardless of how you create your key, it will be found in ~/.gnupg

ls ~/.gnupg/
gpg.conf      pubring.gpg   pubring.gpg~  random_seed   secring.gpg   trustdb.gpg

This means that anyone with root/sudo access on that system can access your private key and decrypt all your correspondence unless you password protect it.  In general, don't store your key on a shared computer.

Creating a key


  • using gpg (terminal)


gpg --gen-key
gpg (GnuPG) 1.4.12; Copyright (C) 2012 Free Software Foundation, Inc.
[..]
Please select what kind of key you want:
   (1) RSA and RSA (default)
   (2) DSA and Elgamal
   (3) DSA (sign only)
   (4) RSA (sign only)
Your selection? 1
RSA keys may be between 1024 and 4096 bits long.
What keysize do you want? (2048)
Requested keysize is 2048 bits
Please specify how long the key should be valid.
         0 = key does not expire
      <n>  = key expires in n days
      <n>w = key expires in n weeks
      <n>m = key expires in n months
      <n>y = key expires in n years
Key is valid for? (0) 0
Key does not expire at all
Is this correct? (y/N) Y
You need a user ID to identify your key; the software constructs the user ID
from the Real Name, Comment and Email Address in this form:
    "Heinrich Heine (Der Dichter) <heinrichh@duesseldorf.de>"
Real name: I Lindqvist
Email address: i.lindqvist@email.net
Comment: fake address
You selected this USER-ID:
    "I Lindqvist (fake address) <i.lindqvist@email.net>"
Change (N)ame, (C)omment, (E)mail or (O)kay/(Q)uit? O
You need a Passphrase to protect your secret key.
You'll get asked for a passphrase twice. Then:
We need to generate a lot of random bytes. It is a good idea to perform
some other action (type on the keyboard, move the mouse, utilize the
disks) during the prime generation; this gives the random number
generator a better chance to gain enough entropy.
Not enough random bytes available.  Please do some other work to give
the OS a chance to collect more entropy! (Need 283 more bytes)
..+++++
...+++++
We need to generate a lot of random bytes. It is a good idea to perform
some other action (type on the keyboard, move the mouse, utilize the
disks) during the prime generation; this gives the random number
generator a better chance to gain enough entropy.
+++++
Not enough random bytes available.  Please do some other work to give
the OS a chance to collect more entropy! (Need 109 more bytes)
.....................+++++
gpg: key 2B4C5636 marked as ultimately trusted
public and secret key created and signed.
gpg: checking the trustdb
gpg: 3 marginal(s) needed, 1 complete(s) needed, PGP trust model
gpg: depth: 0  valid:   1  signed:   0  trust: 0-, 0q, 0n, 0m, 0f, 1u
pub   2048R/2B4C5636 2012-05-02
      Key fingerprint = 5B71 C3F1 0C2D E008 B299  21A8 019F 907E 2B4C 5636
uid                  I Lindqvist (fake address) <i.lindqvist@email.net>
sub   2048R/78F9B6C1 2012-05-02
gpg --list-key
/home/me/.gnupg/pubring.gpg
-----------------------------
pub   2048R/2B4C5636 2012-05-02
uid                  I Lindqvist (fake address) <i.lindqvist@email.net>
sub   2048R/78F9B6C1 2012-05-02
To add more email address, do
gpg --edit-key 2B4C5636
>adduid
and follow the prompts. You do not want to add subkeys.

Do
>trust
to set the trust level. Ultimate for your own key, full for your pals.

  •  using seahorse:
    if it isn't already installed, then
    sudo apt-get install seahorse

    and start it by typing seahorse in the terminal, or selecting Passwords and Keys in gnome. Select New
PGP key
Add details

You can add additional addresses later by selecting your key and right-click, then select Properties


Publish your PUBLIC key:
You can either do this directly using seahorse (very easy), or, if you prefer a more manual approach:

gpg --export -a
-----BEGIN PGP PUBLIC KEY BLOCK-----
Version: GnuPG v1.4.12 (GNU/Linux)
mQENBE+gt4IBCADPY9CyEr1aqU1uqOKquwFOUgsiLNV7pYRLKkTa3hki/8Zz0Ssr
16DIvuO5dGQVsDu712E2FaW3FSzThzPBW9R9z1WNHjZUWtRu78WVNyJJ3WwjJFWV
hmA9kmWzFn14pcqzeD6RAkpK7YrKENu05A2vWB47mWFxlysCxo8VdPoj/uEG0Cvw
BHNrI8raVarwWOPPZiVTp7nbbHySQxZjJTpdR5bEFH+L1AqA3T0YG5FdXryGFXG0
DMLPD3mCSZHoT27WRH4l8mH7K25m6ONUV8u6JDLtSy/WAi9J2nGo5K5r/OetDqe7
zTOaQk7u+WyTxK41nzNk/NRVAUlcc7aM7WXFABEBAAG0MkkgTGluZHF2aXN0IChm
YWtlIGFkZHJlc3MpIDxpLmxpbmRxdmlzdEBlbWFpbC5uZXQ+iQE4BBMBAgAiBQJP
oLeCAhsDBgsJCAcDAgYVCAIJCgsEFgIDAQIeAQIXgAAKCRABn5B+K0xWNtxlB/9K
GAq9Q8YlZjKOnOx2jZWRqE6dHZ5BjNX24SmsVWf0jpEIP1Bj699QiWxxEYeIc2S7
E0vm3G323oEHfiGUlTpqi4piCnrEgm63JKNGWKamKBkYBTvygRFRC7DUWhB6kwP3
FmOU8SMR9+8lSei6IJoRlJUThdF3gWLiNnQtDDowjQL2gIHvh+Ht/geC+fDtN0i5
R7yGUOyIicYDa04dSsX5LZJneouIavNYulTpJc0wth6GOrzAbitVsfdQ84O/Q/Ld
lyI6HSzz/QNDuY2YkAPiejapHBtBP9LukBvFChfkiwNv+RPG9VE8zm0vIg9ylmaf
Fbe1CrawAsjQDM8f1KEtuQENBE+gt4IBCADK5PJMH0I8CB1RoMLo13Ewd8tFoIYu
bXIuV2RpUCTwxOA1nbKiJUrZP0Dxe0aK6GXspEzRtYjpT2QdIvdYsHrr85V4+AsJ
BFQ3ehp6XW2NtyECQyzYlUm4Yo06EU128E0whfeK42b+egWazOrdnt9QKlZCP5lz
UU8L9zJiDI64old79AkbRm7mKdH6uIAwkPG3Eft+2H312MkRGfmiJ/Eq/HQO8ygo
pcg93kqU9RrI8xwfO5plqF9yc9iNzrgDu8iuOPSxYuJtG3cj0W4CzuwLRzMnWFXO
CQpcCWF38/a2HTrXCxA5QAf0Td3P7zc7eZd6JhpzNTTJ7zQeeQreKjhfABEBAAGJ
AR8EGAECAAkFAk+gt4ICGwwACgkQAZ+QfitMVjbn2Af/SURRS72DJ66F0Gpt9bIe
p2zr98c+W4bPru7fVg4uOAxz95H1vK65kX7jZ+9M5yqHGqLNxmVcUcVhbXS+Fkik
LoBxLezU7s1bC40HSFPu00IQQxiH5jv9Dd/kqP16oel+JVGDwmRXFWXqByaWaaNm
6JYHYcCH6B4UwSpSRiwJScbTWsvxq9+WVAUO730FwGy3BYnZAXNeibV2/bbtZbz6
P23zyitFqOizuafvwFIS9pGvbL3pmUkQne0dF1OGhfhsdczZi+LVhnKy6iOy7lTx
6saK149HMndyLNOlS8pmJez2ULXF/fijLlrXAi3zr8a2UFkpYPEIj+emkeFpAGiE
mQ==
=VnnT
-----END PGP PUBLIC KEY BLOCK-----
Then copy/paste it into the front page at pgp.mit.edu


2b. Chat

Gajim
Gajim is seven kinds of awesome, but is primarily used for jabber-compatible protocols. This means gmail gmx, etc.

To set up encryption for an address, go to Edit, Accounts, select the address and go to the Personal tab.
GPG Agent is broken on Debian, so don't use that.
 Before you use gajim to encrypt chat you may need to rightlick on the recipient and assign the correct key:
 Once all that is done, encryption is easy.


mcabber
Mcabber is a terminal chat client and that makes configuration very easy.
Edit ~/.mcabber/mcabberrc and add (or uncomment):

set pgp = 1
set pgp_private_key = "06403515C1XXXX6B"
set pgp_passphrase_retries = 3
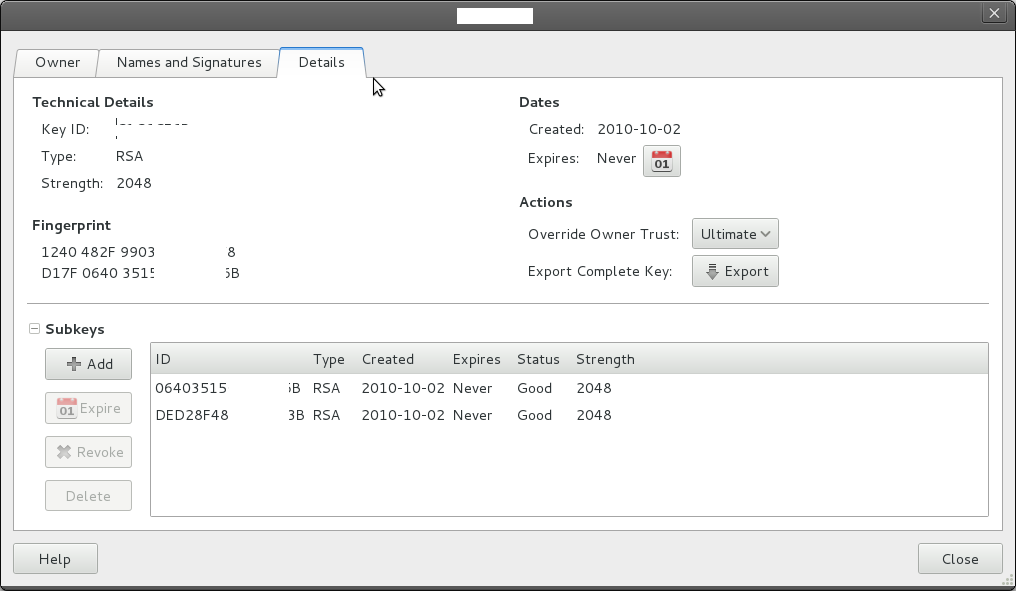
The private key ID is much longer than what you may be used to -- you can look it up using seahorse. pgp.mit.edu will also report it if you've uploaded your public key:


Anyway, start mcabber, select the contact you presumably already have a key for and type:
/info

05-02 16:02 *** jid:  <xxx.xxxxx@xxxx.xxx>                                                                                                                                                                      
05-02 16:02 *** Name: xxxxx at xxxx                                                                                                                                                                              
05-02 16:02 *** Type: user                                                                                                                                                                                        
05-02 16:02 *** Subscription: both                                                                                                                                                                                
05-02 16:02 *** Resource: [o] (50) Gajim76E72461                                                                                                                                                                  
                Status timestamp: 2012-05-02 16:02:09                                                                                                                                                              
                PGP key id: 06403515C1XXXX6B                                                                                                                                                                         
                Last PGP signature: good                                                                                                                                                                             

The contact is recognised and you have their key. So, you should be able to simply start chatting.

Switch encryption on and off using
/pgp enable
and
/pgp disable


So how can you tell whether it's encrypted or not?


05-02 16:02 -~> This is encrypted

05-02 16:09 --> This is not encrypted

Yup. A ~ makes the difference.

Received encrypted messaged look like this:
05-02 16:12 <~= encryption the other way


2c. E-mail

Evolution
Evolution supports integration with gnupg out of the box, but each email address needs to be configured separately. Start evolution, click on Edit, select Preferences, Mail Accounts, highlight the email address you want to configure, click on Edit. Select the Security tab in the Account Editor and type in the key ID.
When you're composing, this is what meets you:


You will have problems encrypting to people who's keys haven't been associated properly with the email address you're composing to.


Thunderbird
Thunderbird isn't as well-supported for PGP/GPG as evolution but there's an add-on, Enigmail 1.4.1 (you might have to download it manually from http://enigmail.mozdev.org/download/index.php.html), which is compatible with Earlybird/Thunderbird 11. The downside on using an add-on is that compatibility sometimes breaks.
The key here is the 'GnuPG was found...' bit. To  gain access the tabs below you can click on Display Expert Settings.

Once you've installed enigmail via the add-on menu and restarted, you can set the preferences:
Most options are straight-forward
You may need to set the key manually if the email address isn't explicitly associated with an address.


Go to Edit, Account Settings, and uncheck use html under Composition and Addressing for each address. Partly because signing will work better, but mainly because you have no reason to use html. Ever.

 And this is how it looks when you are composing emails:
You can choose to sign and/or encrypt emails from simple menu.


Mutt
The key ID is C1XXXX6B. Edit your  .mutt/muttrc file and add (the field which need to be edited are given in red below):
# GPG stuff - autosign
set pgp_decode_command="gpg %?p?--passphrase-fd 0? --no-verbose --batch --output - %f"
set pgp_verify_command="gpg --no-verbose --batch --output - --verify %s %f"
set pgp_decrypt_command="gpg --passphrase-fd 0 --no-verbose --batch --output - %f"
set pgp_sign_command="gpg --no-verbose --batch --output - --passphrase-fd 0 --armor --detach-sign --textmode %?a?-u %a? %f"
set pgp_clearsign_command="gpg --no-verbose --batch --output - --passphrase-fd 0 --armor --textmode --clearsign %?a?-u %a? %f"
set pgp_encrypt_only_command="pgpewrap gpg --batch --quiet --no-verbose --output - --encrypt --textmode --armor --always-trust --encrypt-to 0xC1XXXX6B -- -r %r -- %f"
set pgp_encrypt_sign_command="pgpewrap gpg --passphrase-fd 0 --batch --quiet --no-verbose --textmode --output - --encrypt --sign %?a?-u %a? --armor --always-trust --encrypt-to 0xC1XXXX6B -- -r %r -- %f"
set pgp_import_command="gpg --no-verbose --import -v %f"
set pgp_export_command="gpg --no-verbose --export --armor %r"
set pgp_verify_key_command="gpg --no-verbose --batch --fingerprint --check-sigs %r"
set pgp_list_pubring_command="gpg --no-verbose --batch --with-colons --list-keys %r"
set pgp_list_secring_command="gpg --no-verbose --batch --with-colons --list-secret-keys %r"
set pgp_autosign=yes
set pgp_sign_as=0xC1XXXX6Bset pgp_replyencrypt=yes
set pgp_timeout=1800
set pgp_good_sign="^gpg: Good signature from"
In mutt, p is associated with gpg/pgp:
 In mutt, write your email in vim or nano, then exit the editor and hit p. Select e to encrypt:
And it now shows 'Security: Encrypt', and you can send.


Encrypted VOIP
While skype encrypts by default, skype isn't 'open', and you are not in control.

For twinkle (below), you need a sip address. You sometimes have one via your ISP, but you can also get one for free from e.g. https://www.ekiga.net/index.php?page=register

Twinkle and ccRTPp are available in the debian repos.
sudo apt-get install twinkle
pulls in everything you need

Next, start twinkle and configure it:


The only interesting step is this one:
Select ZRTP/SRTP
Next log in:


 My guess is that you need to include the country code. Don't forget to drop any leading 0s off the area code (the scatter brained cause of the failed call listed in the log below)


20 March 2012

114. Nwchem 6.0 with openmpi support on debian testing

I still haven't managed to compile a working versin of Nwchem 6.1 on Debian 64 bit regardless of whether I'm using mpich or openmpi. The number of posts relating to compiling nwchem is steadily growing, but I'd rather have post which are almost, but not quite, identical if it makes it's unambiguous for the average user how to build and use nwchem.

Anyway, since I'm using openmpi on my rocks cluster(s), I figure I might as well start using openmpi on debian too. In addition, the only way you can get nwchem 6.0 to work with mpich2 on debian seems to be by using the old v1.2 package which causes problems of its own (see apt-pinning).

Note: See here for information about python support: http://verahill.blogspot.com.au/2012/04/adding-python-support-to-nwchem-under.html

Long story short -- nwchem with openmpi:
mkdir ~/tmp
sudo apt-get install openmpi-bin libopenmpi-dev
wget http://www.nwchem-sw.org/images/Nwchem-6.0.tar.gz
tar -xvf Nwchem-6.0.tar.gz
cd nwchem-6.0/

export LARGE_FILES=TRUE
export TCGRSH=/usr/bin/ssh
export NWCHEM_TOP=/home/me/tmp/nwchem-6.0
export NWCHEM_TARGET=LINUX64
export NWCHEM_MODULES=all
export USE_MPI=y
export USE_MPIF=y
export MPI_LOC=/usr/lib/openmpi/lib
export MPI_INCLUDE=/usr/lib/openmpi/include
export LIBRARY_PATH=$LIBRARY_PATH:/usr/lib/openmpi/lib
export LIBMPI="-lmpi -lopen-rte -lopen-pal -ldl -lmpi_f77 -lpthread"
cd $NWCHEM_TOP/src
make clean
make nwchem_config
make FC=gfortran

This will take a good 20-30 minutes.


Your binary will be in nwchem-6.0/bin/LINUX64/

Finally, see whether openmpi is already in your LD_LIBRARY_PATH

echo $LD_LIBRARY_PATH
/lib/openmm:/usr/lib/nvidia-cuda-toolkit:/usr/lib/nvidia
If not, edit ~/.bashrc and add
export LD_LIBRARY_PATH=/usr/lib/openmpi/lib:$LD_LIBRARY_PATH
export PATH=$PATH:/home/me/tmp/nwchem-6.0/bin/LINUX64


17 March 2012

109. Building Thunderbird 11 on Debian testing

The build is fairly straightforward and pretty much identical to building 10.0.2 (earlybird): http://verahill.blogspot.com.au/2012/02/debian-testing-wheezy-64-building.html

As always, uninstall existing versions before installing a new one.

--start here --
First install the dependencies:
sudo apt-get install libdbus-glib-1-dev gir1.2-notify-0.7 libnotify-dev yasm checkinstall libzip-dev zip 


Download the sources  and untar:
mkdir ~/tmp
cd ~/tmp

wget ftp://ftp.mozilla.org/pub/mozilla.org/thunderbird/releases/11.0/source/thunderbird-11.0.source.tar.bz2
tar -xvf thunder-bird-11.0.source.tar.bz2
cd comm-release/

Start the build
./configure --disable-necko-wifi
make -j3

3 is the number of cores +1. If you have a quadcore CPU substitute 3 with 5. The build takes a while so you will probably want to do a parallel build.

Finally, to install
sudo make install


checkinstall is segfaulting for me.

Error:

/home/me/tmp/comm-release/mozilla/js/src/config/nsinstall -R -m 644 ../mozilla-config.h ../../../config/nsStaticComponents.h  ../../../dist/include
make[5]: /home/me/tmp/comm-release/mozilla/js/src/config/nsinstall: Command not found
make[5]: *** [export] Error 127
make[5]: Leaving directory `/home/me/tmp/comm-release/mozilla/js/src/config'
make[4]: *** [export] Error 2
make[4]: *** Waiting for unfinished jobs....
make[4]: Leaving directory `/home/me/tmp/comm-release/mozilla/js/src'
make[3]: *** [export_tier_js] Error 2
make[3]: Leaving directory `/home/me/tmp/comm-release/mozilla'
make[2]: *** [tier_js] Error 2
make[2]: Leaving directory `/home/me/tmp/comm-release/mozilla'
make[1]: *** [default] Error 2
make[1]: Leaving directory `/home/me/tmp/comm-release/mozilla'
Solution:
I got this error because I accidentally untared the new sources into an existing directory with an older version of thunderbird. The solution was to delete the directory and untar the sources again.


08 March 2012

96. Building a real-time kernel (3.2.9) on debian testing

Building an RT kernel is not terribly different from building a vanilla kernel:http://verahill.blogspot.com.au/2012/03/debian-testing-kernel-329.html

The main differences are:
1. the application of the relevant RT kernel patch
2. the configuration of RT specific kernel options

The latter step requires reading up on what an RT kernel does differently from a vanilla kernel, and the configuration will depend on your application.

The value of this guide is fairly small, since you wouldn't typically use an RT kernel on a desktop, but on a dedicate server or embedded system. I'm still working on a cross-compiling guide for non-x86 architectures.

In addition, having an RT kernel is only the first step -- it needs to be used in the correct way to allow for prioritising processes/pre-emptive execution in an efficient way. An overview for a particular application is given here: http://wiki.linuxmusicians.com/doku.php?id=system_configuration

Briefly,
sudo apt-get install kernel-package fakeroot
wget http://www.kernel.org/pub/linux/kernel/v3.0/linux-3.2.9.tar.bz2
wget http://kernel.org/pub/linux/kernel/projects/rt/3.2/patches-3.2.9-rt17.tar.bz2
tar -xvf linux-3.2.9.tar.bz2
cd linux-3.2.9/
bzcat ../patches-3.2.9-rt17.tar.bz2 |patch -p1
cat /boot/config-`uname -r` .config
make oldconfig

You get to answer a number of questions relating to real-time OS execution

  1. No Forced Preemption (Server) (PREEMPT_NONE)
> 2. Voluntary Kernel Preemption (Desktop) (PREEMPT_VOLUNTARY)
  3. Preemptible Kernel (Low-Latency Desktop) (PREEMPT__LL) (NEW)
  4. Preemptible Kernel (Basic RT) (PREEMPT_RTB) (NEW)
  5. Fully Preemptible Kernel (RT) (PREEMPT_RT_FULL) (NEW)
choice[1-5]: 4
[..]
 Testing module to detect hardware-induced latencies (HWLAT_DETECTOR) [M/n/y/?] (NEW)
[..]

Launch the build process
fakeroot make-kpkg -j7 --initrd --revision=3.2.9 --append-to-version=rt kernel_image kernel_headers 

where 7 is the number of cpu cores+1.

The deb-packages will be found in the folder above linux-3.2.9/ and can be installed using sudo pkg -i
.


01 March 2012

89. Compiling kernel 3.2.8 on Debian Testing -- example using kernel-packages and kernel.org source

For kernel 3.2.9, see here: http://verahill.blogspot.com.au/2012/03/debian-testing-kernel-329.html

Following: http://www.linuxplanet.com/linuxplanet/tutorials/6853/1 and http://www.sysdesign.ca/guides/linux_kernel.html  and very much http://old-releases.ubuntu.com/ubuntu/dists/hoary/main/installer-ia64/current/doc/manual/en/ch08s04.html

Update: added kernel_headers

I've added very litte to the guides, except proving that yes, the above tutorial works for the current stable kernel version (3.2.8) and the current debian testing (29/12/2012).

Here's what's new in 3.2.8 -- https://lwn.net/Articles/484042/
Here's what will be new in 3.3 -- http://www.h-online.com/open/features/Kernel-Log-Linux-3-3-goes-into-testing-1418516.html

Everything between SAFE START and END are ok -- they won't change anything serious on your system. If you're building on a 32 bit system, have a look at the end of the post before launching the make.

--  SAFE START --
Install tools:
sudo apt-get install kernel-package fakeroot
(if you use apt-bugs you may get a warning about an lguest bug. Ignore it. Look at the bottom of the post for 32 bit issues and a simple solution.)


Get the latest STABLE release from http://kernel.org/
wget http://www.kernel.org/pub/linux/kernel/v3.0/linux-3.2.8.tar.bz2
It's 75 M and will take a wee while.
tar -xvf linux-3.2.8.tar.bz2
cd linux-3.2.8/

To get a head-start on a configuration file, see if you have one for your current kernel:
ls /boot/config-`uname -r`

If so (I know this is clunky, but the obvious solutions didn't work...)
echo "/boot/config-`uname -r` "|xargs cat > .config

I'm running 3.2.0-1.

Alright. Here's the thing. You shouldn't edit .config unless you know what you're doing. But then how will you ever learn? I don't yet know what I'm doing, so won't lead you into kernel-configuration related temptation.

Instead, we'll just learn how to build.

First
make oldconfig
which uses the .config

But it's not completely automatic -- when it comes to new features you'll have to provide input. Hitting enter i.e. accepting the default option is probably a good idea unless you think otherwise.

Alternatively, you do
make menuconfig
and pick everything you want


Here are the new features in 3.2.8 vs 3.2.0-1: 
  Cirrus Logic (Sound Fusion) New DSP support (SND_CS46XX_NEW_DSP) [Y/n/?] (NEW)
Agere Systems HERMES II Wireless PC Card Model 0110 (WLAGS49_H2) [N/m/?] (NEW)
 Linksys HERMES II.5 WCF54G_Wireless-G_CompactFlash_Card (WLAGS49_H25) [N/m/?] (NEW) 
Y means compile into kernel, m makes a loadable module and no means no.

Now build!
make-kpkg clean
The next step takes forever, in particular if you only use one core (>1 h). It takes ca 50 minutes on an i5 with the -j5 switch. You'll also need around 6.5 Gb of free space for the compilation.
fakeroot make-kpkg -j4 --initrd --revision=3.2.8 kernel_image kernel_headers

where as usual 4 is the number of cores(3)+1. Adjust as necessary.

--SAFE END--

This really isn't dangerous, although you may not want to do it remotely without a back-up plan.

Install with
sudo dpkg -i ../linux-image-3.2.8_3.2.8_amd64.deb
sudo dpkg -i ../linux-headers-3.2.8_3.2.8_amd64.deb

That's it! You don't even have to bother with update-grub.

Reboot at your convenience and admire your handiwork:
uname -a

Linux boron 3.2.8 #2 SMP Wed Feb 29 19:27:04 EST 2012 x86_64 GNU/Lin

The deb built this way is ca 33 M, while the stock debian 3.2.0--1 is a slim 23 M.

Once you're confident that you can compile and install a kernel without mishap you can start to remove kernel modules to make it slimmer -- or start including modules of your own choosing.


Tried and tested on:
AMD Athlon II X3 (64 bit)
2 x AMD Phenom II X6 (64 bit)
Intel i5-2400 (64 bit)
Intel core 2  duo T5870 (laptop, 64 bit)
Intel Celeron 1.6 GHz (32 bit)
-- all running debian testing.


Building on 32 bit

I had some issues on an Intel Celeron 1.6 GHz 32 bit due to a bug:
make[1]: Leaving directory `/home/me/tmp/linux-3.2.8'
/usr/bin/make    ARCH=i386 \
    -C Documentation/lguest
make: *** Documentation/lguest: No such file or directory.  Stop.
make: *** [debian/stamp/build/kernel] Error 2

The failure was pretty annoying...
real 157m58.192s
user 132m27.049s
sys 12m5.589s
There's a simple solution in a forum post at http://billy.com.mx/archives/660:

"I solved it by creating a symlink Documentation/lguest to Documentation/virtual/lguest"
that means (on one line)
ln -s /home/me/tmp/linux-3.2.8/Documentation/virtual/lguest  Documentation/lguest


That's all.


Check:
ls Documentation/lguest -lah
Documentation/lguest -> /home/me/tmp/linux-3.2.8/Documentation/virtual/lguest

ls Documentation/lguest/
extract  lguest.c  lguest.txt  Makefile

And once it's installed:
uname -a
Linux kookaburra 3.2.8 #3 SMP Thu Mar 1 14:43:45 EST 2012 i686 GNU/Linu


Modules
To get a list over the modules in use on your current system:
lsmod | gawk '{printf("%s ",$1)}'| sed 's/Module//g'

zlib_deflate crc32c libcrc32c ufs qnx4 hfsplus hfs minix ntfs vfat msdos fat jfs xfs reiserfs ext3 jbd ext2 pci_stub vbok8 mperf cpufreq_stats cpufreq_conservative cpufreq_powersave cpufreq_userspace ppdev bnep rfcomm bluetooth binfmt_misc as nfs_acl sunrpc kvm_amd kvm xt_state ipt_REJECT ipt_LOG xt_limit xt_tcpudp xt_conntrack iptable_mangle ipt_MASQUERADE ip
le_filter ip_tables x_tables hwmon_vid lp loop snd_hda_codec_hdmi arc4 rt2800usb rt2800lib crc_ccitt rt2x00usb rt2x00lib xer_oss snd_usb_audio snd_pcm snd_hwdep snd_usbmidi_lib nvidia hid_logitech_dj mac80211 joydev snd_seq_midi cfg80211 rfki5100_tco snd_timer snd_seq_device edac_core edac_mce_amd parport_pc parport snd i2c_piix4 soundcore pcspkr k10temp i2c_combcache jbd2 crc16 usb_storage uas sd_mod crc_t10dif ata_generic pata_atiixp ohci_hcd thermal thermal_sys floppy ahci lib
You can use that as a source of inspiration for what to keep and what to trim.


23 February 2012

72. Building maxima from source on Debian Testing


The version of maxima in the debian repos is the same as in the sourceforge archives. There's only one good reason to compile your own version from what I can see -- to get around the dependency of maxima on gnuplot.

Let me explain: the gnuplot version in the debian repos has problems handling small numbers (<10**(-9)). Uninstalling gnuplot and replacing it with your a version you've compiled yourself removes maxima.

Luckily it's easy to build:

wget http://sourceforge.net/projects/maxima/files/latest/download?source=files
mv download\?source\=files maxima-5.26.0.tar.gz
./configure
make -j5

where 5 is the number of cores +1 (I have four cores). Change as needed.

sudo checkinstall

Checkinstall may or may not exit successfully if you have compiled your own version of gnuplot -- see below. Chances are that it built the package correctly.

or 

sudo make install


Error:
If you get
dpkg: error processing maxima_5.26.0-1_amd64.deb (--install):
trying to overwrite '/usr/local/share/info/dir', which is also in package gnuplot 4.4.4-1
dpkg-deb: error: subprocess paste was killed by signal (Broken pipe)

Solution: 
sudo dpkg --force-overwrite -i maxima_5.26.0-1_amd64.deb

You can see that the dir file is ok (GNUPlot is still referred to):

This is the file .../info/dir, which contains the
topmost node of the Info hierarchy, called (dir)Top.
The first time you invoke Info you start off looking at this node.

File: dir, Node: Top This is the top of the INFO tree
  This (the Directory node) gives a menu of major topics.
  Typing "q" exits, "?" lists all Info commands, "d" returns here,
  "h" gives a primer for first-timers,
  "mEmacs<Return>" visits the Emacs manual, etc.
  In Emacs, you can click mouse button 2 on a menu item or cross reference
  to select it.
* Menu:
Emacs
* Imaxima: (imaxima).           Image support for the computer algebra system
                                  Maxima. Interactive math minor mode.
Math
* GNUPLOT: (gnuplot).           An Interactive Plotting Program
* Maxima: (maxima).             A computer algebra system.
* Xmaxima: (xmaxima).           Graphical interface for Maxima.