28 January 2013

328. Liberate your router: dd-wrt on Netgear WGT624 v4

UPDATE 1 Feb 2013: I haven't had any explicit problems with my router since flashing it. Everything is apparently working well and my network connection is reliable and fine (if only subjectively a bit slower than before --  running a speed test shows that it's as fast as ever so not sure what's happening). HOWEVER, I've suddenly started having issues with ECCE and submitting jobs via a frontendMachine -- I kept getting "cannot 'cd' to run directory" errors, but the ECCE log contains no errors messages at all. This wouldn't happen for very small NWChem input files, and it would happen ca 80% of the time. Normally I wouldn't suspect this was a router issue, but changing back to my (unflashed) AR430W resolved the issues immediately. Somehow I suspect this is a router version of this http://verahill.blogspot.com.au/2012/09/briefly-packet-corrupt-during-ssh.html, but then I should see error messages in the ECCE log...

Other than that I'm really happy with dd-wrt (no sarcasm intended -- I've had no other issues and I love the power dd-wrt gives me over my hardware).

Finally, there's the old adage about correlation vs causuality. We'll see if the errors start popping up again while using my AR430W.

Original post:

I've been using Tomato with my WRT54G for a couple of years now, and I'm incredibly happy with it. Since I have a couple of old routers (airlink 1010 ar430w and netgear wgt624 v4) with stock firmware lying around I figured it was time to turn them into something useful. So here's how to flash the netgear router. If it stands up to sustained use I'll be writing an AR430W guide later.


dd-wrt


Lengthy preamble
The stock firmware basically does nothing for me -- it's clunky, slow, and there's no terminal access. In particular, I want busybox/ssh, Tomato does all that for me, but it doesn't support a particularly wide range of routers (I reckon that Tomato is the reason why Linksys WRT54GL still costs $90 in Australia, in spite of being old as sin -- those who doubt the value of opening up their hardware may want to consider the RoI on that one)

In addition to Tomato, there's also DD-WRT (supported devices) and OpenWRT (supported devices). DD-WRT support a huge number of routers, but it appears to be a whole lot more complicated to install than Tomato. Maybe this varies according to the router as well.

For instructions you're referred via the database to the dd-wrt forum thread about your router. The problem with this is that you'll be facing 30-odd pages with instructions, problems, dead-ends etc. Some threads end with a step-by-step summary on how to install dd-wrt, but not all do.

Anyway, here's my best attempt at writing a simple and complete step-by-step guide to replacing the stock firmware on Netgear WGT24 v4 with DD-WRT on Debian Testing/Wheezy. I'm basically just following this blog post: http://lauriaus.no-ip.org/blog/?p=90 , but hopefully I've added enough detail to make it possible for just about anyone to follow this guide.

Please consult http://www.dd-wrt.com/site/support/router-database to see what files you need. NOTE: the files below only apply to v4 of Netgear WGT624. Installing them on any other router may brick it.


On your linux computer:

Get the files:
sudo apt-get install atftpd tftp putty
cd /tmp
mkdir ftpdboot
cd ftpdboot/
wget http://www.dd-wrt.com/dd-wrtv2/downloads/others/redboot_collection/images_default/redboot_ap61_16M_4M_admtek.rom
wget http://www.dd-wrt.com/routerdb/de/download/Netgear/WGT624/v4/linux.bin/3614 -O linux.bin
wget http://www.dd-wrt.com/routerdb/de/download/Netgear/WGT624/v4/wgt624v4-firmware.bin/3613 -O wgt624v4-firmware.bin

Edit /etc/default/atftpd:
USE_INETD=false #true OPTIONS="--tftpd-timeout 300 --retry-timeout 5 --mcast-port 1758 --mcast-addr 239.239.239.0-255 --mcast-ttl 1 --maxthread 100 --verbose=5 /tmp/ftpdboot"

Edit /etc/inetd.conf
32 tftp dgram udp4 wait nobody /usr/sbin/tcpd /usr/sbin/in.tftpd --tftpd-timeout 300 --retry-timeout 5 --mcast-port 1758 --mcast-addr 239.239.239.0-255 --mcast-ttl 1 --maxthread 100 --verbose=5 /tmp/ftpdboot
and do
sudo /etc/init.d/openbsd-inetd reload

for good luck. If you don't have openbsd-inetd you may have xinetd or inetutils-inetd installed instead (I think openbsd-inetd is default on debian). Edit the command as necessary.

Edit your /etc/network/interfaces file:
auto eth0 iface eth0 inet static address 192.168.1.155 gateway 192.168.1.1 netmask 255.255.255.0

and run
sudo service networking restart

Make sure that your card came up ok (do e.g. ip addr)
2: eth0: broadcast mtu 1500 qdisc pfifo_fast state UP qlen 1000 link/ether 00:26:9e:27:9b:20 brd ff:ff:ff:ff:ff:ff inet 192.168.1.155/24 brd 192.168.1.255 scope global eth0
Continue.

Prepare two terminals, side by side (or start a screen session with two tabs open). In one, type
echo "^C"> end.txt
putty telnet 192.168.1.1:9000 -m end.txt

But don't hit enter after the second command.

In the other terminal, type
ping 192.168.1.1

but don't hit enter.

Connect the ethernet port on your computer to one of the ethernet LAN ports (not WAN/Internet) on your router.

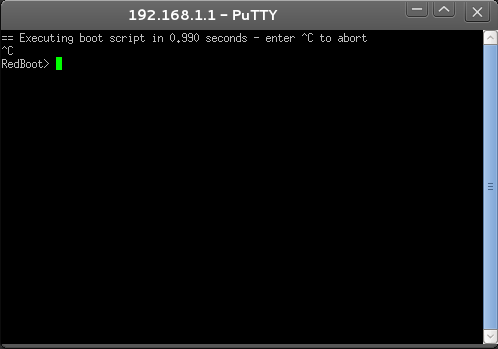
You are next going to unplug the power from the router, and hit enter after the ping command. Immediately when you get ping replies:
64 bytes from 192.168.1.1: icmp_req=4 ttl=64 time=0.371 ms
you hit enter after the putty command in the other window. If nothing good happens, then redo (i.e. unplug the router, hit enter after the ping command etc. Don't start the ping until you're re-plugged the router).

Ready? GO!
ping 192.168.1.1
64 bytes from 192.168.1.1: icmp_req=1 ttl=64 time=0.371 ms
putty telnet 192.168.1.1:9000 -m end.txt

And you should get

Before you continue make sure that you've opened up your firewall e.g. if you're not connected to the internet you can go crazy like this:
sudo iptables -P INPUT ACCEPT
sudo iptables -P OUTPUT ACCEPT
sudo iptables -P FORWARD ACCEPT

And don't forget to restore your firewall once you're done.
Time to get dangerous.

RedBoot> fis init
About to initialize [format] FLASH image system - continue (y/n)? Y *** Initialize FLASH Image System ... Erase from 0xbffe0000-0xbfff0000: . ... Program from 0x80ff0000-0x81000000 at 0xbffe0000: . RedBoot> ip_address -h 192.168.1.155 IP: 192.168.1.1/255.255.255.0, Gateway: 192.168.1.254 Default server: 192.168.1.155
RedBoot> load -r -b %{FREEMEMLO} redboot_ap61_16M_4M_admtek.rom
Using default protocol (TFTP) TFTP timed out 1/15 Can't load 'redboot_ap61_16M_4M_admtek.rom': operation timed out
Try again:
RedBoot> load -r -b %{FREEMEMLO} redboot_ap61_16M_4M_admtek.rom
Using default protocol (TFTP) Raw file loaded 0x80040c00-0x8005007f, assumed entry at 0x80040c00
RedBoot> fis create -l 0x30000 -e 0xbfc00000 RedBoot fis create -l 0x30000 -e 0xbfc00000 RedBoot An image named 'RedBoot' exists - continue (y/n)? y ... Erase from 0xbfc00000-0xbfc30000: ... ... Program from 0x80040c00-0x80050080 at 0xbfc00000: . ... Erase from 0xbffe0000-0xbfff0000: . ... Program from 0x80ff0000-0x81000000 at 0xbffe0000: .
RedBoot> reset

You'll see a couple of flashing lights on the router as the only indication that something just happened. Kill your current putty connection and start a new one.
=~=~=~=~=~=~=~=~=~=~=~= PuTTY log 2013.01.28 20:29:38 =~=~=~=~=~=~=~ ^C
RedBoot> fis init
About to initialize [format] FLASH image system - continue (y/n)? y *** Initialize FLASH Image System ... Erase from 0xbffe0000-0xbfff0000: . ... Program from 0x80ff0000-0x81000000 at 0xbffe0000: .
RedBoot> ip_address -h 192.168.1.155
IP: 192.168.1.1, Default server: 192.168.1.155
RedBoot> load -r -b 0x80041000 linux.bin
Using default protocol (TFTP) Raw file loaded 0x80041000-0x803ecfff, assumed entry at 0x80041000
RedBoot> fis create linux

Be patient -- this step takes a long time: 19 minutes in my case (some routers take an hour). Write down the time when it starts and WAIT at least 20 minutes.
... Erase from 0xbfc10000-0xbffbc000: ........................................................... ... Program from 0x80041000-0x803ed000 at 0xbfc10000: ........................................................... ... Erase from 0xbffe0000-0xbfff0000: . ... Program from 0x80ff0000-0x81000000 at 0xbffe0000: .
RedBoot> fconfig
Run script at boot: true Boot script: .. fis load -l kernel .. go Enter script, terminate with empty line
>> fis load -l linux >> exec >> Boot script timeout (1000ms resolution): 12 Use BOOTP for network configuration: false bootp_my_gateway_ip: 192.168.1.254 Local IP address: 192.168.1.1 bootp_my_ip_mask: 255.255.255.0 Default server IP address: 192.168.1.55 Console baud rate: 9600 GDB connection port: 9000 Force console for special debug messages: false net_debug: false Update RedBoot non-volatile configuration - continue (y/n)? y ... Erase from 0xbffe0000-0xbfff0000: . ... Program from 0x80ff0000-0x81000000 at 0xbffe0000: . RedBoot> reset

Done!

You can now navigate to 192.168.1.1 in your router, but unplug, replug the router for good luck.
Success!


I created a user called admin and set a password i.e. there's no pw or username you need to know a priori.
click on services


check sshd

Don't trust important infrastructure with passwords. Use keys.


And finally
ssh root@192.168.1.1

and hopefully you're in.

First impressions:
The busybox ('linux') version is a bit too sparse for my liking -- no netstat command...but it's still obviously a major step up from the stock firmware. dd-wrt is different from tomato -- if you're used to one you're not necessarily going to feel comfortable with the other. Luckily, dd-wrt is widely used and there are plenty of resource online. In addition, there's a demo ( http://www.dd-wrt.com/demo/ ) so you can try it out before installing it.

How to set up 'static' dhcp (i.e. make sure that some computers always have the same IP address while still running a dhcp server) wasn't completely obvious either, but this post helped: http://www.dd-wrt.com/wiki/index.php/Static_DHCP


25 January 2013

327. Installing Octave, Gnuplot, maxima etc on OSX 10.8.2 via macports

Update 7 Feb 2013: Got my hand on a Mac again and sorted out the octave forge packages.

NOTE: while on the surface this has little to do with linux, it IS in our interest to get people on other platforms to use the same tools we do. Or at least compatible ones. So knowing about macports will help even the most die-hard linux user. In fact, it will help especially those.


I'm no friend of Apple, Mac or OS X for many reasons (restrictive environment, weird mouse, their typical target audience), but pragmatism will make you happier than zealotry. What doesn't work for me obviously works for other people.

Students (and professors) at Australian universities do use apple laptops in significant number though (yet our ERP system only works properly with Internet Explorer -- try requesting leave using chrome on linux and you may be in for a surprise) so I've recently been faced with the issue of installing my standard linux tools on students' apple laptops. In fact it's gotten so bad that several Australian universities 'give' ipads to all their students for 'free' (nothing is free when you're paying for it through your tuition). As someone working at a uni I resent this since, by using the one platform where you can't install what you want on it, this puts pressure on me to restrict my teaching to what can be had via the almighty app store. (there's a lot of BS about blended learning, and you'd be lucky to find a white board anywhere. Blackboards are completely gone which is idiocy of the first degree)

Anyway. There's plenty of people here using Macbook-thingies and it's in my own interest to get them on the narrow path to justice, liberty and the FOSS way.

Macports is a really cool package manager/repository for linux software for Mac OSX and works by compiling the software from the sources -- pretty much how I imagine that the Gentoo experience may be like. Anyway, it works fine although it takes a fair amount of time to install things.


So here's how to do it (no screenshots because I'm typing this from memory):
  1. Open the App Store and install XCode (free)
  2. Open Xcode, go to Preferences/Download, and install Command Line Tools
  3. Download macports via this link for OS X 10.8: https://distfiles.macports.org/MacPorts/MacPorts-2.1.2-10.8-MountainLion.pkg
    Other versions of OS X are also supported, see here: http://www.macports.org/install.php
  4. Install the downloaded macports by opening the .pkg file
  5. Open a Terminal window  (Applications/Utilities/Terminal) and run
  6. sudo port -v selfupdate
  7. Run
  8. sudo port install gnuplot maxima vim nano xterm
    which will take a while -- it needs to set up the build environment from scratch in addition to regular dependencies. Set aside an hour or so just in case. If there's an error, try running the command once more.

  9. Run
  10. sudo port install octave-devel qtoctave-mac
    which will take a long while. If the compile seems to have stopped, checked the titlebar of the terminal window -- the command it's executing will continously change during the compile)

  11. Run octave by running the command
    octave
    in the terminal.
  12. To install octave packages you can install them in the Octave environment :
    pkg install -forge miscellaneous struct general optim
  13. addpath
  14. In case you're having problems actually using the octave-forge packages, you might need to create/edit your ~/.octaverc along the lines of
    addpath('/Users/verahill/octave/optim-1.2.2')
    Replace verahill with the proper user name, and edit the version number as needed.

  15. X11/Xquartz - setting DISPLAY
  16. At this point
    echo $DISPLAY
    gave nothing, and trying to launch an X11 program (e.g. xterm) complained that DISPLAY was not set. Setting DISPLAY manually (export DISPLAY=:0.0) didn't help either.

    'Bad' solution: the first solution was to install xorg-server (sudo port install xorg-server), and then manually
    X &
    export DISPLAY=:0.0
    
    or
    Xquartz &
    export DISPLAY=:0.0
    
    Both X and Xquartz come from macports.

    Good solution
    I then tried to change tack and went to http://xquartz.macosforge.org/landing/ and downloaded XQuartz-2.7.4.dmg (I was originally under the impression that it came as default with "mountain lion" but no.).
    Open the file, then run the .pkg file in that archive. Log out of OSX, then log in again. Now try launching e.g. xterm form a terminal and it should work.


The entire process will take well over an hour, but at the end of it you'll have Octave, Gnuplot AND a complete build environment!

And there are plenty more things you can install with macports (e.g. qtoctave (qtoctave-mac), gedit (gedit gedit-plugins), kile, maxima, qtiplot).

Not sure why I am so excited over it since all these things are available in most linux repos, but there you go -- compiling stuff is ALWAYS exciting.

24 January 2013

326. Compiling Thunderbird 17.0.2 on Debian Testing

I tested this compile in a bare chroot, so the dependencies should be pretty much hammered out. The build is easy but fairly slow.

sudo apt-get install bzip2 build-essential python zip libgtk2.0-dev libdbus-glib-1-dev libasound2-dev libogg-dev libxt-dev yasm libcurl4-openssl-dev mesa-common-dev
mkdir ~/tmp
cd ~/tmp
wget ftp://ftp.mozilla.org/pub/mozilla.org/thunderbird/releases/17.0.2/source/thunderbird-17.0.2.source.tar.bz2
rm -rf comm-release/
tar xvf thunderbird-17.0.2.source.tar.bz2
mkdir bldthunder17
cd bldthunder17/
../comm-release/./configure --disable-necko-wifi
make
sudo make install

That took 122 minutes on a single core.
Checkinstall doesn't work and ends with segfault.


23 January 2013

325. Compiling ECCE 6.4 on Debian Testing

!NOTE! If you provide ECCE with 'localhost' as the hostname, be aware that this will block outside access: http://www.nwchem-sw.org/index.php/Special:AWCforum/st/id858/#post_3178

There's a new release of ECCE 6.4 out which fixes the following bug: http://verahill.blogspot.com.au/2012/11/minor-bug-in-ecce.html


A note on Java: I've only had luck with the openjdk packages -- not with the Oracle/sun java ones (see here: http://verahill.blogspot.com.au/2012/06/building-ecce-on-debian-testingwheezy.html).

This build was tested in a chrooted Testing/Wheezy i.e. I should've caught most of the necessary packages.


Compiling:
Download the source to ecce from http://ecce.emsl.pnl.gov/using/download.shtml, and put it in e.g. ~/tmp

sudo apt-get install bzip2 build-essential autoconf libtool ant pkg-config gtk+-2.0-dev libxt-dev csh gfortran openjdk-7-jdk python-dev libjpeg-dev imagemagick xterm
cd ~/tmp
tar xvf ecce-v6.4-src.tar.bz2
cd ecce-v6.4/
export ECCE_HOME=`pwd`
cd build/
./build_ecce
Hit return if xterm was found... The /home/sandbox/tmp/ecce-v6.4/scripts/sysdir script identifies the build platform directory as: empty Because this value is empty no platform-specific parent directory will be created for ECCE executables, libraries, etc. This works fine unless your site needs support for multiple platforms. Finished checking prerequisites for building ECCE. Do you want to skip these checks for future build_ecce invocations (y/n)? Y
./build_ecce
Xerces built
./build_ecce
Mesa OpenGL built
./build_ecce
wxWidgets built
./build_ecce
running build_ext wxPython built
./build_ecce
Apache HTTP server built
./build_ecce
Making combined tar file ecce.v6.4.tar Copying NWChem binary distribution nwchem-6.1.1-binary-rhel5-gcc4.1.2-m64.tar.bz2 Copying NWChem common distribution nwchem-6.1.1-binary-common.tar.bz2 Concatenating install script and combined tar file ecce.v6.4.tar create_ecce_bin finished ECCE built and distribution created in /home/sandbox/tmp/ecce-v6.4
cd ../ ./install_ecce.v6.4.csh

And see the next section for the installation steps.
The compilation steps take progressively longer and longer, so be patient during the build.

Installing:
Digital ink is cheap, so I'll show the whole process:
./install_ecce.v6.4.csh
Main ECCE installation menu =========================== 1) Help on main menu options 2) Prerequisite software check 3) Full install 4) Full upgrade 5) Application software install 6) Application software upgrade 7) Server install 8) Server upgrade IMPORTANT: If you are uncertain about any aspect of installing or running ECCE at your site, please refer to the detailed ECCE Installation and Administration Guide at http://ecce.pnl.gov/docs/installation/2864B-Installation.pdf Hit at prompts to accept the default value in brackets. Selection: [1] 3 Host name: [beryllium] localhost Application installation directory: [/home/sandbox/tmp/ecce-v6.4/ecce-v6.4/apps] /home/sandbox/.ecce/apps Server installation directory: [/home/sandbox/.ecce/server] ECCE v6.4 will be installed using the settings: Installation type: [full install] Host name: [localhost] Application installation directory: [/home/sandbox/.ecce/apps] Server installation directory: [/home/sandbox/.ecce/server] Are these choices correct (yes/no/quit)? [yes] Installing ECCE application software in /home/sandbox/.ecce/apps... Extracting application distribution... Extracting NWChem binary distribution... Extracting NWChem common distribution... Extracting client WebHelp distribution... Configuring application software... Configuring NWChem... Installing ECCE server in /home/sandbox/.ecce/server... Extracting data server in /home/sandbox/.ecce/server/httpd... Extracting data libraries in /home/sandbox/.ecce/server/data... Extracting Java Messaging Server in /home/sandbox/.ecce/server/activemq... Configuring ECCE server... ECCE installation succeeded. *************************************************************** !! You MUST perform the following steps in order to use ECCE !! -- Unless only the user 'sandbox' will be running ECCE, start the ECCE server as 'sandbox' with: /home/sandbox/.ecce/server/ecce-admin/start_ecce_server -- To register machines to run computational codes, please see the installation and compute resource registration manuals at http://ecce.pnl.gov/using/installguide.shtml -- Before running ECCE each user must source an environment setup script. For csh/tcsh users add this to ~/.cshrc: if ( -e /home/sandbox/.ecce/apps/scripts/runtime_setup ) then source /home/sandbox/.ecce/apps/scripts/runtime_setup endif For sh/bash users, add this to ~/.profile or ~/.bashrc: if [ -e /home/sandbox/.ecce/apps/scripts/runtime_setup.sh ]; then . /home/sandbox/.ecce/apps/scripts/runtime_setup.sh fi ***************************************************************

Instead of following the instructions above I normally do:
echo 'export ECCE_HOME=/home/sandbox/.ecce/apps' >> ~/.bashrc
echo 'PATH=$PATH:/home/sandbox/.ecce/server/ecce-admin/:/home/sandbox/.ecce/apps/scripts/' >> ~/.bashrc
echo 
source ~/.bashrc

You can now start ecce by either doing
ecce

or if that complains, do
start_ecce_server

then waiting a little while (10 s), followed by
ecce


Apppendix:

Selecting Java version
sudo update-alternatives --config java
There are 7 choices for the alternative java (providing /usr/bin/java). Selection Path Priority Status ------------------------------------------------------------ 0 /usr/lib/jvm/java-6-openjdk-amd64/jre/bin/java 1061 auto mode 1 /usr/bin/gij-4.4 1044 manual mode 2 /usr/bin/gij-4.6 1046 manual mode 3 /usr/bin/gij-4.7 1047 manual mode 4 /usr/lib/jvm/j2re1.6-oracle/bin/java 314 manual mode 5 /usr/lib/jvm/j2sdk1.6-oracle/jre/bin/java 315 manual mode 6 /usr/lib/jvm/java-6-openjdk-amd64/jre/bin/java 1061 manual mode * 7 /usr/lib/jvm/java-7-openjdk-amd64/jre/bin/java 1051 manual mode

I've got ECCE running fine with openjdk 7 as well as openjdk 6.

22 January 2013

324. Setting up a private git server

Update 11 Feb 2013: fixed a typo that ruined everything.

I've recently moved one of my more mature projects to sourceforge.net, which allowed me to re-discover the joys of using a version management system, in this case git. While I've spent some time playing with SVN in the past, git feels more natural to me. That's it's used widely in the FOSS community certainly doesn't hurt either.

So that got me interested in setting up a local git server for projects that may or may not result in anything tangible i.e. projects that I don't want to put online, but are under so much flux that they may break anytime (and I thus want to be able to roll back).

[A pointer to my students: you can obviously use git to maintain versions of your .tex documents as well...]

In this particular case the development machine and the git host are the same. The project is called shellnmr (an attempt to make a bash-like shell in python for NMR processing)

This is very much inspired by/stolen from: http://tumblr.intranation.com/post/766290565/how-set-up-your-own-private-git-server-linux


Getting set up:

On the git host (which has not yet got a copy of the source code)
sudo apt-get install git
mkdir ~/work/programming/var -p
cd ~/work/programming/var
mkdir shellnmr
cd shellnmr/
git init --bare
Initialized empty Git repository in /home/me/work/programming/var/shellnmr
First time:
I''ll use localhost below because in this particular example the git host and the development machine is the same.

On the/a development machine, where we keep the already existing project in ~/work/shellnmr


cd ~/work/shellnmr
git init
Initialized empty Git repository in /home/me/work/shellnmr/.git/
git add . git commit -m 'initial commit'
[master (root-commit) 5214860] initial commit 2 files changed, 178967 insertions(+) create mode 100644 functions.py create mode 100755 main.py
git remote rm origin git remote add origin me@localhost:/home/me/work/programming/var/shellnmr git push origin master
Counting objects: 2, done. Delta compression using up to 3 threads. Compressing objects: 100% (18/18), done. Writing objects: 100% (2/2), 339.14 KiB, done. Total 2 (delta 5), reused 0 (delta 0) To me@localhost:/home/me/work/programming/var/shellnmr * [new branch] master -> master


Everyday usage:

Say you've edited the code on your development machine and want to commit the changes:
git commit -a
git push

Easy.

Let's say you go home and want to continue editing the code there and that this is the first time you're doing so:
git clone user@githost:/home/me/work/programming/var/nmrshell nmrshell-code

When you're done editing, just commit as normal;
git commit -a
git push

Let's say you've edited the code on another computer, committed the code, and then want to get the latest updates on your regular development machine again:
git pull origin master

And that's about it.

GUI - gitk:
The debian repos have a git GUI as well. To install do
sudo apt-get install git-gui gitk

Start it by launching gitk from the directory where you keep your files (on the development machine)

20 January 2013

323. Wine 1.5.22 on Debian Testing/Wheezy. Compiling using multiarch

UPDATE 16 May 2013: See here for Wine 1.5.30: http://verahill.blogspot.com.au/2013/05/416-wine-1530-in-chroot.html

Another update: It seems like your mileage in terms of how well Wine will work for you will vary using this method. It works fine for me and I suspect it's because I've built earlier Wine versions of my systems and have ia32-libs-dev installed. This package is no longer available in Testing. ia32-libs installs the libs you need, but does not provide symlinks between .so and .so.X files -- you can probably do that by hand if necessary though. It's not for beginners.

An additional thing to remember is that the 1.5 series of Wine is a development series -- 1.4 is the stable series which is meant for end users. Progress made in 1.5 will be included in 1.6.

NOTE: there are a couple of issues, and they will depend on how your system is set up.
* libosmesa6-dev:i386 will require mesa-common-dev:i386 which will remove libosmesa6-dev:amd64 and more, which is bad.
* libglu1-mesa-dev:i386 depends on libgl1-mesa-dev:i386 which will remove libgl1-mesa-dev:amd64 and more, which is bad.
*  libgstreamer-plugins-base0.10-dev:i386 depends on libgstreamer0.10-dev:i386 which depends on gir1.2-gstreamer-0.10:i386 which depends on gir1.2-freedesktop:i386 which depends on gir1.2-glib-2.0:i386 which depends on libgirepository-1.0-1:i386 which will remove a whole lot of packages (132 on one of my systems, including gnome, gdm3 etc.)

I'm working on figuring out what's triggering this on some systems but not others.
In the mean time see http://verahill.blogspot.com.au/2013/01/308-compiling-wine-1521-on-debian.html to see how to build wine in a chroot, which is safe. You can then install that .deb package on your normal system and HOPEFULLY there won't be any broken dependencies. You won't need the -dev:i386 packages on the install target.

ldd `which wine` 
linux-gate.so.1 => (0x55573000) libwine.so.1 => /usr/local/lib/libwine.so.1 (0x55576000) libpthread.so.0 => /lib32/libpthread.so.0 (0x556ec000) libc.so.6 => /lib32/libc.so.6 (0x55705000) libdl.so.2 => /lib32/libdl.so.2 (0x55867000)
so you really don't seem to need much in the way of shared libs installed.

A new incremental version of wine is out.

There's little difference between building 1.5.21 and 1.5.22 but here it is anyway. The build is very easy on an up-to-date installation of Testing/Wheezy. If you are on stable, the list over needed packages can be found in this post.

See here for recent changes between different Wine versions: http://linux.softpedia.com/progChangelog/Wine-Changelog-148.html

Compiling
sudo dpkg --add-architecture i386
sudo apt-get update

sudo apt-get install libx11-dev:i386 libfreetype6-dev:i386 libxcursor-dev:i386 libxi-dev:i386 libxxf86vm-dev:i386 libxrandr-dev:i386 libxinerama-dev:i386 libxcomposite-dev:i386 libglu-dev:i386 libosmesa-dev:i386 libglu-dev:i386 libosmesa-dev:i386 libdbus-1-dev:i386 libgnutls-dev:i386 libncurses-dev:i386 libsane-dev:i386 libv4l-dev:i386 libgphoto2-2-dev:i386 liblcms-dev:i386 libgstreamer-plugins-base0.10-dev:i386 libcapi20-dev:i386 libcups2-dev:i386 libfontconfig-dev:i386 libgsm1-dev:i386 libtiff-dev:i386 libpng-dev:i386 libjpeg-dev:i386 libmpg123-dev:i386 libopenal-dev:i386 libldap-dev:i386 libxrender-dev:i386 libxml2-dev:i386 libxslt-dev:i386 libhal-dev:i386 libcurl4-openssl-dev:i386 gettext prelink bzip2 bison flex oss4-dev checkinstall ocl-icd-libopencl1:i386 opencl-headers gcc-multilib

mkdir ~/tmp
cd ~/tmp
wget http://prdownloads.sourceforge.net/wine/wine-1.5.22.tar.bz2
tar xvf wine-1.5.22.tar.bz2
cd wine-1.5.22/
./configure
config.status: executing include/wine commands config.status: executing Makefile commands configure: Finished. Do 'make' to compile Wine.
time make -j4 sudo checkinstall --install=no
***************************************** **** Debian package creation selected *** ***************************************** This package will be built according to these values: 0 - Maintainer: [ root@lithium ] 1 - Summary: [ wine 1.5.22 ] 2 - Name: [ wine ] 3 - Version: [ 1.5.22 ] 4 - Release: [ 1 ] 5 - License: [ GPL ] 6 - Group: [ checkinstall ] 7 - Architecture: [ amd64 ] 8 - Source location: [ wine-1.5.22 ] 9 - Alternate source location: [ ] 10 - Requires: [ ] 11 - Provides: [ wine ] 12 - Conflicts: [ ] 13 - Replaces: [ ] [..] Copying files to the temporary directory...
sudo dpkg -i wine_1.5.22-1_amd64.deb

where 4 is the number of cores on your build machine (see here and here for -jN). The build took 13 minutes on a three-core AMD Athlon II X3 445 (3.1 GHz) with -j4. The 'Copying files to...' can take quite a while, so let it run to completion.

Anyway, that's it. An easy build.

18 January 2013

322. Libreoffice and zotero for reference management

I'm happy using latex and bibtex whenever possible, and I'm forced to use Microsoft Office and Endnote in most of my collaborations, so I;m not that interested in libreoffice/openoffice.

However, having heard of a reference manager called Zotero has made me curious to learn more.

You can either get it as a plug-in for firefox, or as a stand-alone program which plugs into any browser of your choice.

While I haven't used Endnote seriously for about half a decade and thus may not know about any fancy recently added functionality, I just can't see any reason whatsoever to use Endnote anymore if you have a choice. Obviously, given the inertia of the 'common user' and the tendency for people to equal costly with good and cheap with rubbish, it will probably take a generation or two for change to happen, no matter how good zotero gets.

And here's another thing: when I went to Google Scholar using Chrome, zotero was recognised, and a list of 'updates' was suggested. I wasn't really interested, until I had a look at them -- Scholar had generated a pretty impressive list of articles that it thought might interest me. The match was surprisingly good. If nothing else I'll certainly make sure to keep my zotero database synced with my bibtex one.


Get it:
sudo apt-get install bzip2
wget http://download.zotero.org/standalone/3.0.11.1/Zotero-3.0.11.1_linux-x86_64.tar.bz2
tar xvf Zotero-3.0.11.1_linux-x86_64.tar.bz2
cd Zotero_linux-x86_64/
./run-zotero.sh

First time:
First time you run it it opens a browser window as well as an installation process
For some reason I keep getting errors about DBus even though the dbus-daemon is running. It hasn't caused any other problems beyond the error message in the screenshot.
Even the openoffice I installed for testing purposes got detected

And you're done

To make it work in Chrome, install the extension

The main Zotero window, without any references


Testing:
Importing a bibtex library

Everything looks ok


If you click on the icon by the arrow you can insert a citation. You need to have zotero running in the background though.
Determine what format to use

Generate the bibliography and you're done


Google Scholar, Chrome and Zotero play nicely together


16 January 2013

321. Compiling Kernel 3.7.3 (and 3.7.2) on Debian Testing/Wheezy. More data on make -jN.

Updated for 3.7.3

Since post '319. Collection of errors when compiling kernel 3.7.x on AMD FX 8150' is getting traffic from people wanting to compile kernel 3.7.2, and because I didn't know whether the azx_runtime_suspend bug had been fixed, I had to try it out. So here's how to compile kernel 3.7.2 and 3.7.3 -- for 3.7.2 simply replace all instances of 3.7.3..

Looking at the code changes here: http://lists-archives.com/linux-kernel/27763782-alsa-hda-move-runtime-pm-check-to-runtime_idle-callback.html and comparing with what I'm actually seeing in sound/pci/hda/hda_intel.c it seems that 3.7.2 and 3.7.3 have been fixed and no patches need to be applied.

Testing the kernel bears that out.


Compiling the kernel
sudo apt-get install kernel-package fakeroot build-essential ncurses-bin ncurses-dev
mkdir ~/tmp
cd ~/tmp
wget http://www.kernel.org/pub/linux/kernel/v3.0/linux-3.7.3.tar.bz2
tar xvf linux-3.7.3.tar.bz2
cd linux-3.7.3/
cat /boot/config-`uname -r`>.config
make oldconfig
make-kpkg clean

If you want to add specific drivers etc to the kernel, run
make menuconfig

Note that if you're transitioning from kernel 3.5 to 3.7 you will needto specifically and explicitly include a lot of the graphics (pci tv cards, usb web cams) drivers that used to be automatically included before. Then continue:

time fakeroot make-kpkg -j6 --initrd kernel_image kernel_headers
sudo dpkg -i ../linux-image-3.7.3_3.7.3-10.00.Custom_amd64.deb ../linux-headers-3.7.3_3.7.3-10.00.Custom_amd64.deb

And you're done. Keep reading to learn more about -j6.


Optimal -jN
See here for another post on -jN: http://verahill.blogspot.com.au/2013/01/305-make-jn-should-n-equal-number-of.html. In short, it's not always clear whether N should equal the number of cores, or be larger than the number of cores. In that post, N+1 was the optimal configuration, but that was a very short compilation where i/o likely played a large role.

More data is needed, so here it is. Seems like N=number of cores is the best option for long builds (as was pointed out to me in a comment). This was done with kernel 3.7.2.

On a four-core Intel i5-2400 with 16 Gb memory
N Time ------------- 2 30m 58s 3 22m 36s 4 19m 49s 5 22m 2s 6 23m 13s

Acquired using sar/sysstat
Here's what's happening with -j4:
Basically, the first 15 minutes things are running in parallel, with t i/o slowing things down during the last 5 minutes.

On a six-core AMD Phenom II 1055T with 8 Gb memory
N Time (s) ------------- 4 34m 16s 5 27m 19s 6 24m 60s 7 30m 18s 8 31m 47s


Hardware profiles:
Intel machine:
00:00.0 0600: 8086:0100 (rev 09) 00:02.0 0300: 8086:0102 (rev 09) 00:16.0 0780: 8086:1c3a (rev 04) 00:16.3 0700: 8086:1c3d (rev 04) 00:19.0 0200: 8086:1502 (rev 04) 00:1a.0 0c03: 8086:1c2d (rev 04) 00:1b.0 0403: 8086:1c20 (rev 04) 00:1c.0 0604: 8086:1c10 (rev b4) 00:1c.2 0604: 8086:1c14 (rev b4) 00:1d.0 0c03: 8086:1c26 (rev 04) 00:1e.0 0604: 8086:244e (rev a4) 00:1f.0 0601: 8086:1c4e (rev 04) 00:1f.2 0104: 8086:2822 (rev 04) 00:1f.3 0c05: 8086:1c22 (rev 04)

AMD machine:
00:00.0 0600: 1022:9601 00:01.0 0604: 1022:9602 00:07.0 0604: 1022:9607 00:11.0 0106: 1002:4390 00:12.0 0c03: 1002:4397 00:12.1 0c03: 1002:4398 00:12.2 0c03: 1002:4396 00:13.0 0c03: 1002:4397 00:13.1 0c03: 1002:4398 00:13.2 0c03: 1002:4396 00:14.0 0c05: 1002:4385 (rev 3c) 00:14.1 0101: 1002:439c 00:14.2 0403: 1002:4383 00:14.3 0601: 1002:439d 00:14.4 0604: 1002:4384 00:14.5 0c03: 1002:4399 00:18.0 0600: 1022:1200 00:18.1 0600: 1022:1201 00:18.2 0600: 1022:1202 00:18.3 0600: 1022:1203 00:18.4 0600: 1022:1204 01:05.0 0300: 1002:9715 01:05.1 0403: 1002:970f 02:00.0 0200: 10ec:8168 (rev 03) 03:05.0 0200: 10ec:8169 (rev 10

320. Wsearch32 in Wine

Wsearch32 is a windows program that does what it's supposed to -- open mass spectrometer data files. Because our students use it quite a lot and to save me time in training them, here's how to install wsearch32 and how to get started with it. It runs almost perfectly in Wine.

One notable thing about Wsearch is that it opens HP Agilent Chemstation .D files without any problems. It's notable because different versions of HP Agilent Chemstation can't even open files written by other versions (yup, it's true...) of the same damned program.

Another obvious advantage of Wsearch is that it makes it very easy to export data, although it only exports one spectrum at a time (i.e. you can't get the full time-dependent data set).

WSearch was written by Frank Antolasic at the RMIT in Melbourne, Australia.


What doesn't work under Wine: It will freeze if you try to open several files at the same time. This does not happen on native Windows.


Installation
Download it from here: http://www.wsearch.com.au/
wget http://www.wsearch.com.au/wsearch32/wsearch32.zip
unzip wsearch32.zip
and follow the instructions:
There's nothing odd about the installation process

It works as well as under windows


Screenshots
This is the default view

Click on the import icon (the red one in the left corner), and select your file. There are plenty of supported formats.

This is the TIC view. Click anywhere on the TIC to get the corresponding spectrum

TIC and spectrum view.

Click on the M/I icon on the right to get a list of all the data in the spectrum plot..
You can then save the spectrum in a range of ascii based formats.


You can get the acquisition headers under Chromatogram/List header info. You can also make ion plots  in the same menu.
Wsearch also comes with a simple isotopic pattern calculator.

The Help works fine under linux/wine


This is the free version of wsearch -- there is some functionality missing.


15 January 2013

319. Collection of errors when compiling kernel 3.7.x on AMD FX 8150

Update 20th Feb 2013:  Kernel 3.8 compiles fine on AMD FX 8150. Just ignore kernel 3.7.

Original post:

This is a collection of errors
(although you can obviously compile the kernel this way -- just not on AMD FX 8150...)

It does not hold any solutions

See here for how to compile kernel 3.7.0 to 3.7.1:
http://verahill.blogspot.com.au/2012/12/compiling-kernel-37-on-debian.html
and here for how to patch 3.7.1
http://verahill.blogspot.com.au/2012/12/patching-kernel-371-to-fix.html

See here for how to compile 3.7.2 and 3.7.3:
http://verahill.blogspot.com.au/2013/01/321-compiling-kernel-372-on-debian.html

Post continues:
Normally this wouldn't merit its own post, but because I've been annoyed over the inability to compile
kernels on my AMD FX 8150 I decided to collect as much data on the errors as possible.

Basically, kernel 3.7.x fails to build on AMD FX 8150, while kernels 3.6.3 and 3.5 build just fine.
Here's the lspci -n hardware profile for my system, although I'm fairly certain it's due to AMD FX 8150:
00:00.0 0600: 1002:5a14 (rev 02) 00:04.0 0604: 1002:5a18 00:09.0 0604: 1002:5a1c 00:11.0 0106: 1002:4390 (rev 40) 00:12.0 0c03: 1002:4397 00:12.2 0c03: 1002:4396 00:13.0 0c03: 1002:4397 00:13.2 0c03: 1002:4396 00:14.0 0c05: 1002:4385 (rev 42) 00:14.1 0101: 1002:439c (rev 40) 00:14.2 0403: 1002:4383 (rev 40) 00:14.3 0601: 1002:439d (rev 40) 00:14.4 0604: 1002:4384 (rev 40) 00:14.5 0c03: 1002:4399 00:15.0 0604: 1002:43a0 00:15.1 0604: 1002:43a1 00:15.2 0604: 1002:43a2 00:15.3 0604: 1002:43a3 00:16.0 0c03: 1002:4397 00:16.2 0c03: 1002:4396 00:18.0 0600: 1022:1600 00:18.1 0600: 1022:1601 00:18.2 0600: 1022:1602 00:18.3 0600: 1022:1603 00:18.4 0600: 1022:1604 00:18.5 0600: 1022:1605 01:00.0 0300: 10de:0a65 (rev a2) 01:00.1 0403: 10de:0be3 (rev a1) 02:00.0 0c03: 1b6f:7023 (rev 01) 03:06.0 0200: 10ec:8169 (rev 10) 04:00.0 0200: 10ec:8168 (rev 06)

The lower number of errors for kernel 3.7 below is because I did -j1 (so fewer threads to finish), not because it's any better.

Compilation (-O1 example)
mkdir ~/tmp
cd ~/tmp
wget http://www.kernel.org/pub/linux/kernel/v3.0/linux-3.7.2.tar.bz2
tar xvf linux-3.7.2.tar.bz2
cd linux-3.7.2/
cat /boot/config-`uname -r`>.config
make oldconfig
make-kpkg clean
find -name Makefile|xargs -I {} sed -i 's/\-O2/\-O1/g' {}
time fakeroot make-kpkg -j9 --initrd kernel_image kernel_headers

Errors:

-O2 on kernel 3.7.2 with AMD FX 8150:
net/mac80211/mesh_hwmp.c:1224:1: internal compiler error: in dwarf2out_finish, at dwarf2out.c:22603 Please submit a full bug report, with preprocessed source if appropriate. See for instructions. The bug is not reproducible, so it is likely a hardware or OS problem. make[3]: *** [net/mac80211/mesh_hwmp.o] Error 1 make[2]: *** [net/mac80211] Error 2 make[2]: *** Waiting for unfinished jobs.... net/netfilter/xt_esp.c:94:1: internal compiler error: Segmentation fault Please submit a full bug report, with preprocessed source if appropriate. See for instructions. The bug is not reproducible, so it is likely a hardware or OS problem. make[3]: *** [net/netfilter/xt_esp.o] Error 1 make[2]: *** [net/netfilter] Error 2 make[1]: *** [net] Error 2 make[1]: *** Waiting for unfinished jobs.... /home/me/tmp/linux-3.7.2/arch/x86/include/asm/msr-index.h:1:0: internal compiler error: Segmentation fault Please submit a full bug report, with preprocessed source if appropriate. See for instructions. The bug is not reproducible, so it is likely a hardware or OS problem. make[6]: *** [drivers/net/wireless/ath/ath9k/ar5008_phy.o] Error 1 make[6]: *** Waiting for unfinished jobs.... make[5]: *** [drivers/net/wireless/ath/ath9k] Error 2 make[4]: *** [drivers/net/wireless/ath] Error 2 make[3]: *** [drivers/net/wireless] Error 2 make[3]: *** Waiting for unfinished jobs.... /home/me/tmp/linux-3.7.2/arch/x86/include/asm/elf.h:78:1: internal compiler error: Segmentation fault Please submit a full bug report, with preprocessed source if appropriate. See for instructions. The bug is not reproducible, so it is likely a hardware or OS problem. make[4]: *** [drivers/tty/ipwireless/main.o] Error 1 make[3]: *** [drivers/tty/ipwireless] Error 2 make[3]: *** Waiting for unfinished jobs.... drivers/tty/serial/jsm/jsm_neo.c: In function 'neo_intr': drivers/tty/serial/jsm/jsm_neo.c:1244:1: internal compiler error: Aborted Please submit a full bug report, with preprocessed source if appropriate. See for instructions. The bug is not reproducible, so it is likely a hardware or OS problem. make[5]: *** [drivers/tty/serial/jsm/jsm_neo.o] Error 1 make[4]: *** [drivers/tty/serial/jsm] Error 2 make[3]: *** [drivers/tty/serial] Error 2 make[2]: *** [drivers/tty] Error 2 make[2]: *** Waiting for unfinished jobs.... drivers/staging/silicom/bp_proc.c:74:31: warning: 'bp_procfs_dir' defined but not used [-Wunused-variable] drivers/staging/silicom/bp_proc.c:76:31: warning: 'proc_getdir' defined but not used [-Wunused-function] {standard input}: Assembler messages: {standard input}:37643: Error: can't resolve `.LVL231' {*UND* section} - `.Ltext0' {.text section} {standard input}:37739: Error: can't resolve `.LVL231' {*UND* section} - `.Ltext0' {.text section} {standard input}:37743: Error: can't resolve `.LVL231' {*UND* section} - `.Ltext0' {.text section} {standard input}:37783: Error: can't resolve `.LVL231' {*UND* section} - `.Ltext0' {.text section} make[4]: *** [drivers/staging/speakup/kobjects.o] Error 1 make[3]: *** [drivers/staging/speakup] Error 2 make[3]: *** Waiting for unfinished jobs.... make[2]: *** [drivers/staging] Error 2 make[2]: *** [drivers/net] Error 2 In file included from include/linux/genhd.h:65:0, from include/linux/blkdev.h:9, from include/scsi/scsi_cmnd.h:5, from drivers/scsi/sym53c8xx_2/sym_glue.h:58, from drivers/scsi/sym53c8xx_2/sym_hipd.c:44: include/linux/fs.h:1550:49: internal compiler error: Segmentation fault Please submit a full bug report, with preprocessed source if appropriate. See for instructions. The bug is not reproducible, so it is likely a hardware or OS problem. make[4]: *** [drivers/scsi/sym53c8xx_2/sym_hipd.o] Error 1 make[3]: *** [drivers/scsi/sym53c8xx_2] Error 2 make[3]: *** Waiting for unfinished jobs.... make[2]: *** [drivers/scsi] Error 2 make[1]: *** [drivers] Error 2 make: *** [debian/stamp/build/kernel] Error 2

and finally
/lib/x86_64-linux-gnu/libc.so.6(__libc_start_main+0xfd)[0x2b377411eead] /usr/lib/gcc/x86_64-linux-gnu/4.7/cc1[0x4d2f51] ======= Memory map: ======== 00400000-00fd3000 r-xp 00000000 08:01 1312897 /usr/lib/gcc/x86_64-linux-gnu/4.7/cc1 011d2000-011dd000 rw-p 00bd2000 08:01 1312897 /usr/lib/gcc/x86_64-linux-gnu/4.7/cc1 011dd000-0133c000 rw-p 00000000 00:00 0 01df7000-020b7000 rw-p 00000000 00:00 0 [heap] 2b3772f20000-2b3772f40000 r-xp 00000000 08:01 11800025 /lib/x86_64-linux-gnu/ld-2.13.so 2b3772f40000-2b3772f42000 rw-p 00000000 00:00 0 2b377313f000-2b3773140000 r--p 0001f000 08:01 11800025 /lib/x86_64-linux-gnu/ld-2.13.so 2b3773140000-2b3773141000 rw-p 00020000 08:01 11800025 /lib/x86_64-linux-gnu/ld-2.13.so 2b3773141000-2b3773142000 rw-p 00000000 00:00 0 2b3773148000-2b3773151000 r-xp 00000000 08:01 2233201 /usr/lib/x86_64-linux-gnu/libfakeroot/libfakeroot-sysv.so 2b3773151000-2b3773351000 ---p 00009000 08:01 2233201 /usr/lib/x86_64-linux-gnu/libfakeroot/libfakeroot-sysv.so 2b3773351000-2b3773352000 rw-p 00009000 08:01 2233201 /usr/lib/x86_64-linux-gnu/libfakeroot/libfakeroot-sysv.so 2b377336b000-2b377336c000 rw-p 00000000 00:00 0 2b3773370000-2b3773384000 r-xp 00000000 08:01 1321607 /usr/lib/x86_64-linux-gnu/libmpc.so.2.0.0 2b3773384000-2b3773584000 ---p 00014000 08:01 1321607 /usr/lib/x86_64-linux-gnu/libmpc.so.2.0.0 2b3773584000-2b3773585000 rw-p 00014000 08:01 1321607 /usr/lib/x86_64-linux-gnu/libmpc.so.2.0.0 2b3773588000-2b37735e3000 r-xp 00000000 08:01 1321605 /usr/lib/x86_64-linux-gnu/libmpfr.so.4.1.0 2b37735e3000-2b37737e3000 ---p 0005b000 08:01 1321605 /usr/lib/x86_64-linux-gnu/libmpfr.so.4.1.0 2b37737e3000-2b37737e5000 rw-p 0005b000 08:01 1321605 /usr/lib/x86_64-linux-gnu/libmpfr.so.4.1.0 2b37737e8000-2b377384f000 r-xp 00000000 08:01 1321603 /usr/lib/x86_64-linux-gnu/libgmp.so.10.0.5 2b377384f000-2b3773a4f000 ---p 00067000 08:01 1321603 /usr/lib/x86_64-linux-gnu/libgmp.so.10.0.5 2b3773a4f000-2b3773a57000 rw-p 00067000 08:01 1321603 /usr/lib/x86_64-linux-gnu/libgmp.so.10.0.5 2b3773a57000-2b3773a58000 rw-p 00000000 00:00 0 2b3773a58000-2b3773a5a000 r-xp 00000000 08:01 11800014 /lib/x86_64-linux-gnu/libdl-2.13.so 2b3773a5a000-2b3773c5a000 ---p 00002000 08:01 11800014 /lib/x86_64-linux-gnu/libdl-2.13.so 2b3773c5a000-2b3773c5b000 r--p 00002000 08:01 11800014 /lib/x86_64-linux-gnu/libdl-2.13.so 2b3773c5b000-2b3773c5c000 rw-p 00003000 08:01 11800014 /lib/x86_64-linux-gnu/libdl-2.13.so 2b3773c60000-2b3773c76000 r-xp 00000000 08:01 11796562 /lib/x86_64-linux-gnu/libz.so.1.2.7 2b3773c76000-2b3773e75000 ---p 00016000 08:01 11796562 /lib/x86_64-linux-gnu/libz.so.1.2.7 2b3773e75000-2b3773e76000 r--p 00015000 08:01 11796562 /lib/x86_64-linux-gnu/libz.so.1.2.7 2b3773e76000-2b3773e77000 rw-p 00016000 08:01 11796562 /lib/x86_64-linux-gnu/libz.so.1.2.7 2b3773e78000-2b3773ef9000 r-xp 00000000 08:01 11800003 /lib/x86_64-linux-gnu/libm-2.13.so 2b3773ef9000-2b37740f8000 ---p 00081000 08:01 11800003 /lib/x86_64-linux-gnu/libm-2.13.so 2b37740f8000-2b37740f9000 r--p 00080000 08:01 11800003 /lib/x86_64-linux-gnu/libm-2.13.so 2b37740f9000-2b37740fa000 rw-p 00081000 08:01 11800003 /lib/x86_64-linux-gnu/libm-2.13.so 2b37740fa000-2b37740fb000 rw-p 00000000 00:00 0 2b3774100000-2b3774280000 r-xp 00000000 08:01 11796538 /lib/x86_64-linux-gnu/libc-2.13.so 2b3774280000-2b3774480000 ---p 00180000 08:01 11796538 /lib/x86_64-linux-gnu/libc-2.13.so 2b3774480000-2b3774484000 r--p 00180000 08:01 11796538 /lib/x86_64-linux-gnu/libc-2.13.so 2b3774484000-2b3774485000 rw-p 00184000 08:01 11796538 /lib/x86_64-linux-gnu/libc-2.13.so 2b3774485000-2b377448d000 rw-p 00000000 00:00 0 2b3774490000-2b3774681000 r--p 00000000 08:01 1310939 /usr/lib/locale/locale-archive 2b3774681000-2b377469e000 rw-p 00000000 00:00 0 2b37746a3000-2b37750d8000 rw-p 00000000 00:00 0 2b3775119000-2b3776444000 rw-p 00000000 00:00 0 2b3776460000-2b3776475000 r-xp 00000000 08:01 11796737 /lib/x86_64-linux-gnu/libgcc_s.so.1 2b3776475000-2b3776675000 ---p 00015000 08:01 11796737 /lib/x86_64-linux-gnu/libgcc_s.so.1 2b3776675000-2b3776676000 rw-p 00015000 08:01 11796737 /lib/x86_64-linux-gnu/libgcc_s.so.1 2b3778000000-2b3778021000 rw-p 00000000 00:00 0 2b3778021000-2b377c000000 ---p 00000000 00:00 0 7ffffd08f000-7ffffd0b2000 rw-p 00000000 00:00 0 [stack] 7ffffd200000-7ffffd201000 r-xp 00000000 00:00 0 [vdso] ffffffffff600000-ffffffffff601000 r-xp 00000000 00:00 0 [vsyscall]


-O1; kernel 3.7.2; AMD FX 8150
fs/ecryptfs/keystore.c:1168:28: warning: 'payload_len' may be used uninitialized in this function [-Wmaybe-uninitialized] sound/pci/hda/patch_cmedia.c:777:1: internal compiler error: in size_of_die, at dwarf2out.c:7795 Please submit a full bug report, with preprocessed source if appropriate. See for instructions. The bug is not reproducible, so it is likely a hardware or OS problem. make[4]: *** [sound/pci/hda/patch_cmedia.o] Error 1 make[3]: *** [sound/pci/hda] Error 2 make[3]: *** Waiting for unfinished jobs.... make[2]: *** [sound/pci] Error 2 make[1]: *** [sound] Error 2 make[1]: *** Waiting for unfinished jobs.... In file included from drivers/mtd/chips/cfi_cmdset_0001.c:35:0: drivers/mtd/chips/cfi_cmdset_0001.c: In function 'cfi_intelext_write_words': include/linux/mtd/map.h:331:11: warning: 'r.x[0]' may be used uninitialized in this function [-Wmaybe-uninitialized] drivers/media/usb/gspca/topro.c:4968:1: internal compiler error: Segmentation fault Please submit a full bug report, with preprocessed source if appropriate. See for instructions. The bug is not reproducible, so it is likely a hardware or OS problem. make[5]: *** [drivers/media/usb/gspca/topro.o] Error 1 make[4]: *** [drivers/media/usb/gspca] Error 2 make[3]: *** [drivers/media/usb] Error 2 make[3]: *** Waiting for unfinished jobs.... drivers/net/ethernet/amd/nmclan_cs.c: In function 'nmclan_config': drivers/net/ethernet/amd/nmclan_cs.c:625:3: warning: 'pcmcia_request_exclusive_irq' is deprecated (declared at include/pcmcia/ds.h:201) [-Wdeprecated-declarations] make[2]: *** [drivers/media] Error 2 make[2]: *** Waiting for unfinished jobs.... drivers/net/ethernet/intel/ixgb/ixgb_ee.c:604:1: internal compiler error: Segmentation fault Please submit a full bug report, with preprocessed source if appropriate. See for instructions. The bug is not reproducible, so it is likely a hardware or OS problem. make[6]: *** [drivers/net/ethernet/intel/ixgb/ixgb_ee.o] Error 1 make[6]: *** Waiting for unfinished jobs.... make[5]: *** [drivers/net/ethernet/intel/ixgb] Error 2 make[4]: *** [drivers/net/ethernet/intel] Error 2 make[3]: *** [drivers/net/ethernet] Error 2 make[3]: *** Waiting for unfinished jobs.... make[2]: *** [drivers/net] Error 2 make[1]: *** [drivers] Error 2 make: *** [debian/stamp/build/kernel] Error 2

-O0, kernel 3.7.2, AMD FX 8150
exec make kpkg_version=12.036+nmu3 -f /usr/share/kernel-package/ruleset/minimal.mk debian INITRD=YES exec debian/rules INITRD=YES kernel_image kernel_headers Setup is 16988 bytes (padded to 17408 bytes). System is 2884 kB CRC f8376713 drivers/isdn/hardware/eicon/divasi.c:577:1: internal compiler error: Segmentation fault Please submit a full bug report, with preprocessed source if appropriate. See for instructions. The bug is not reproducible, so it is likely a hardware or OS problem. make[5]: *** [drivers/isdn/hardware/eicon/divasi.o] Error 1 make[4]: *** [drivers/isdn/hardware/eicon] Error 2 make[4]: *** Waiting for unfinished jobs.... make[3]: *** [drivers/isdn/hardware] Error 2 make[3]: *** Waiting for unfinished jobs.... make[2]: *** [drivers/isdn] Error 2 make[2]: *** Waiting for unfinished jobs.... fs/reiserfs/bitmap.c: In function 'scan_bitmap_block.constprop.9': fs/reiserfs/bitmap.c:236:9: warning: 'next' may be used uninitialized in this function [-Wmaybe-uninitialized] make[1]: *** [drivers] Error 2 make[1]: *** Waiting for unfinished jobs.... make: *** [debian/stamp/build/kernel] Error 2

Error messages when compiling kernel 3.7 on AMD FX 8150 with -O2 or -O1

exec make kpkg_version=12.036+nmu3 -f /usr/share/kernel-package/ruleset/minimal.mk debian INITRD=YES exec debian/rules INITRD=YES kernel_image kernel_headers net/xfrm/xfrm_sysctl.c:75:1: internal compiler error: in pop_scope, at c-decl.c:1244 Please submit a full bug report, with preprocessed source if appropriate. See for instructions. The bug is not reproducible, so it is likely a hardware or OS problem. make[3]: *** [net/xfrm/xfrm_sysctl.o] Error 1 make[2]: *** [net/xfrm] Error 2 make[1]: *** [net] Error 2 make: *** [debian/stamp/build/kernel] Error 2


Kernel 3.7 with -O0 on AMD FX 8150
exec make kpkg_version=12.036+nmu3 -f /usr/share/kernel-package/ruleset/minimal.mk debian INITRD=YES exec debian/rules INITRD=YES kernel_image kernel_headers In file included from include/acpi/platform/aclinux.h:59:0, from include/acpi/platform/acenv.h:141, from include/acpi/acpi.h:56, from drivers/acpi/acpica/exmisc.c:45: include/linux/sched.h:1352:9: internal compiler error: Segmentation fault Please submit a full bug report, with preprocessed source if appropriate. See for instructions. The bug is not reproducible, so it is likely a hardware or OS problem. make[4]: *** [drivers/acpi/acpica/exmisc.o] Error 1 make[3]: *** [drivers/acpi/acpica] Error 2 make[2]: *** [drivers/acpi] Error 2 make[1]: *** [drivers] Error 2 make: *** [debian/stamp/build/kernel] Error 2

13 January 2013

318. qmol 0.3.2: A molecular weight calculator for Linux

Over a year ago I complained about the lack of a decent molecular weight calculator in linux in general, and in Debian Testing in particular.  I eventually managed to hack together a molecular weight calculator in Python as part of an isotopic pattern calculator in Python.

However, interpreted languages like python tend to be a bit slower than compiled languages (generally not critical for a molecular weight calculator, but could be for an isotopic pattern calculator), and, perhaps more importantly, my scripts don't feature a GUI.

I vaguely remember trying to compile Kmol by Tomislav Gountchev over a year ago, and as far as I can recall it wasn't working out since it depended on packages (kde-3) that were too old.

But things are changing.

Thomas Mitterfellner has revived Kmol in the form of qmol. Since it's very recent (version 0.1 was created in November 2012, and we're now at version 0.3.2) it's not found in the Debian repos, and maybe won't for some time given that Debian Testing/Wheezy is frozen.

There are, however, a pre-built .deb file for debian squeeze/stable (and Suse, Ubuntu, Fedora etc.) -- so if you're on stable you do not have to compile. Instead go here: http://download.opensuse.org/repositories/home:/lineinthesand/

qmol is a fairly complete solution, and importantly is highly configurable while at the same time being straightforward to use. In particular I like the ability to define your own chemical groups AND the ability to run it from the command line. It's basically what I've been waiting for with the exception of the lack of an isotopic pattern calculator -- but that may come by version 1.0.

Also, the documentation -- or qmol handbook -- is quite extensive and is available under help.


Enough talking -- time for compiling.

sudo apt-get install bzip2 build-essential cmake libqtcore4 libqtgui4 qt4-qmake libqt4-dev
mkdir ~/tmp 
cd ~/tmp
wget http://downloads.sourceforge.net/project/qmol/qmol-0.3.2/qmol-0.3.2.tar.bz2
tar xvf qmol-0.3.2.tar.bz2
mkdir buildqmol
cd buildqmol/
cmake ../qmol-0.3.2
make
sudo make install

Don't worry if you get
-- Looking for Q_WS_X11 -- Looking for Q_WS_X11 - found -- Looking for Q_WS_WIN -- Looking for Q_WS_WIN - not found. -- Looking for Q_WS_QWS -- Looking for Q_WS_QWS - not found. -- Looking for Q_WS_MAC -- Looking for Q_WS_MAC - not found.

during the cmake stage.

Usage: Either run qmol from the command line:
qmol 'N(CH3)4'
N(CH3)4 = C4H12N: 74.146 g/mol C 64.80 H 16.31 N 18.89
The output format can be configured when qmol is in gui mode (Edit/Options).

or launch it by typing
qmol
A virgin window

Previous formulae aggregate at the bottom of the  window

It doesn't handle 0, but then neither does my calculator (yet)

It's very easy to define your own group -- but  only the first letter can be  upper case

Options menu -- you can format the command line output here

It works!
There are only two small things to watch out for: the inability to handle 0 (but you get an error message -- my calculator just give you an erroneous result which is arguably worse...) and the requirement that only the first letter in an abbreviation can be upper case (for reasons of ambiguity -- c.f. e.g. CHO vs C, H, O)