13 March 2013

358. Gentoo in a virtual machine

This post took a LONG time to write, so hopefully someone, somewhere, will find it useful. My enthusiasm was also somewhat tempered during the installation. Gentoo just didn't speak to me. Maybe I'll feel differently in 6-12 months of Arch?

The post...

I'm sure that there are plenty of similar posts out there, and I admit that my main reason for writing this post isn't as much to get anyone else to play with gentoo (although it's certainly an interesting experience -- but probably a bit more fun on native hardware with a bit more oomph) as to provide myself with a written step-by-step instruction set if I should switch my mini-server to gentoo (I use it for testing/educational purposes).

I also realise that given that the most obvious advantage of gentoo is the hardware optimised binaries, running things in a virtual machine isn't going to show off the real strength of gentoo. Hopefully it might give an accurate impression of the complexity (or lack thereof) of gentoo as compared to other distros such as Arch and Debian.

Virtual machine
I'm doing this in a virtual machine. The principal reason is that I don't have any spare metal at the moment. The secondary reason is that because gentoo installation is very interactive, you will most likely not be able to do a complete installation in a single 2-hour sitting the first time (you'll have to look things up, think about modules etc. -- and compiling everything takes time), and doing things in a virtual machine makes it very easy to freeze the system until you have time to continue. Obviously you can also do it the old-fashioned way (simply chroot the system when you are ready to continue), but freezing is easier.

I probably should have switched to KVM by now, but since I'm not really that interested in using virtual machines for work, and since virtualbox is so simple to use, I'll be using Virtualbox here.

I wouldn't recommend trying Gentoo until you first feel somewhat familiar with the basic concepts on Linux (by using e.g. Debian), followed by trying a more hands-on distro like Arch, or one of the BSDs. Obviously, I'm biased since this is the path I've taken, but I still think that you're better off pushing yourself little by little, than suddenly jumping into something unfamiliar which then may turn into something that seems unfriendly and losing all interest as a consequence.

That's not to say that gentoo is difficult. What is or isn't difficult depends on your expectations and frame of reference. What I am saying is that gentoo will make a lot more sense if you have at least a conceptual idea of what is needed for a system to be bootable and useful (if you don't know that you need an X server, you won't enjoy this. If you haven't played with GRUB, you won't enjoy this).

Anyway.

I've followed http://www.gentoo.org/doc/
-- although I've focused on getting a working system quickly rather than spending a lot of time looking into what hardware I really have.

1. Create the virtual machine.
If you need help setting up a virtual machine you are most likely not going to enjoy gentoo (yet -- so come back in a few months), so I won't show that. Suffice to say that I created a machine with 1024 Mb RAM and 15 Gb HDD. The size of the harddisk is due to compilations normally requiring a fair amount of temporary storage space (you can probably get around it with tempfs if  you can spare it).

2. Get a gentoo cd. 
At this point we have an unpartitioned, unbootable harddrive so we need to boot our machine using some form of linux distro that can partition our virtual machine harddrive, as well as chroot gentoo. You don't need the gentoo cds for this, but it does make sense to use them.

You can use a minimal CD,a full DVD, or a stage 3 tarball. I'll use the CD.

Mirrors are found here: http://www.gentoo.org/main/en/mirrors2.xml
You will want to go to /gentoo/releases/amd64/current-iso and pick your architecture, e.g. I did

wget ftp://ftp.swin.edu.au/gentoo/releases/amd64/current-iso/install-amd64-minimal-20130110.iso
wget ftp://ftp.swin.edu.au/gentoo/releases/amd64/current-iso/install-amd64-minimal-20130110.iso.DIGESTS
sha512sum install-amd64-minimal-20130110.iso
77ab0ba00767b6d4668d0f4bf7effbf2af3f38a1bd7cef297a17076478fd46d05b15a80188da473cf7d7f8c220acbe615afd300de4af90011d54185be2697f7d install-amd64-minimal-20130110.iso
cat install-amd64-minimal-20130110.iso.DIGESTS
# SHA512 HASH 77ab0ba00767b6d4668d0f4bf7effbf2af3f38a1bd7cef297a17076478fd46d05b15a80188da473cf7d7f8c220acbe615afd300de4af90011d54185be2697f7d install-amd64-minimal-20130110.iso

3. Boot
Attach the iso to your virtual machine and boot/start.

Hit enter.
The fun begins :)

Note that everything in virtualbox 'just works' since there's a dhcp server etc. Real-world hardware may require a bit more work to get the network etc. up and running. Anyway, the gentoo manual tries to cover most eventualities, which may make it a bit more complicated to follow. We don't have to worry about most options.

4. Partition the drive
ls /dev/sd*
/dev/sda
fdisk /dev/sda

Hit n (for new partition), p (for primary), accept 1, and 2048, set +13G, then n, p, 2, and accept the defaults. Do a, then 1 to make partition 1 bootable. Do t, 2, 82 to set sda2 as swap. Hit w to write. You've now created one bootable root and one swap partition.

mkswap /dev/sda2
mkfs.ext4 /dev/sda1

This isn't the gentoo way -- we're using a single root here instead of making separate partitions for root, usr, home etc. On the other hand, since we're just exploring we might as well keep things simple.

5. Setting up the chroot
Make sure that the date/time is right.

date -s "18:08 20130307"
mount /dev/sda1 /mnt/gentoo
cd /mnt/gentoo
wget ftp://ftp.swin.edu.au/gentoo/releases/x86/current-stage3/stage3-i686-20121213.tar.bz2
tar xvjpf stage3-i686-20121213.tar.bz2

Extracting the stage3 file creates the standard linux file structure (/var, /boot, /dev, /etc, /proc etc.).
Edit the (/mnt/gentoo)/etc/ports/make.conf
vi etc/ports/make.conf
CFLAGS="-O2 -march=native -pipe"
CXXFLAGS="${CFLAGS}"
MAKEOPTS="-j1"
CHOST="i686-pc-lnux-gnu"
USE="bindist"

If you have multiple cores, change the MAKEOPTS accordingly. The USE flag seems to be 'bindist' on i686, and 'bindist mmx sse sse2' on amd64. Presumably they depend on what gentoo detects on boot, and you will probably want to keep these.

mirrorselect -i -o >> /mnt/gentoo/etc/portage/make.conf
mirrorselect -i -r -o >> /mnt/gentoo/etc/portage/make.conf
cp /etc/resolv.conf etc/resolv.conf
mount -t proc none proc/
mount --rbind /sys sys/
mount --rbind /dev dev/

6. Enter the chroot -- set-up
chroot /mnt/gentoo /bin/bash
source /etc/profile
mkdir /usr/portage
emerge-webrsync

This will take a while, so don't give up if it seems stuck on 'Syncing local tree' and there's no network traffic.
.
emerge --sync
eselect profile list

There are seven different profiles on i686 and 13 on amd64 to choose from. I picked number 4 (default/gnome).
eselect profile set 4

I can't stand nano, so
emerge portage
emerge vim

Vim does take quite a while to install, so if you're happy with nano, stick with it.

Edit /etc/portage/make.conf
USE="bindist gnome gtk -kde -qt4"
Keep the USE flags that were there from the beginning and append gnome, gtk etc. I admit that I can't be bothered reading through /usr/portage/profiles/use.desc just in order to check out gentoo.

cp /usr/share/zoneinfo/Australia/Melbourne /etc/localtime
echo "Australia/Melbourne" > /etc/timezone

7. Compile/Install the kernel

emerge gentoo-sources
cd /usr/src/linux

Time to build a kernel! Do
make help|less

and look at the targets. Be aware that if you do 'emerge pciutils' as recommended by the gentoo guide this will take a long, long time since it pulls in 60 packages...but you need to if you want a working lspci.

My approach here is to first use make localmodconfig to get all the currently loaded modules, and then add more support manually via make menuconfig. Remember that if you screw things up you can always go back and redo it later. Build a minimal configuration, then explore what else you need to add (USB support etc.)

make localmodconfig
make menuconfig

IMPORTANT: 
1. Make sure to change 'Device Drivers/Serial ATA and Parallel ATA drivers' from (M) to (*).
2. Go to the submenu and make sure that AHCI SATA support is starred (i.e. not M) as well as 'Generic ATA support' Otherwise you'll probably find yourself consulting this post: http://wiki.gentoo.org/wiki/Knowledge_Base:Unable_to_mount_root_fs due to
VFS: Cannot open root device "sda1" or unknown-block(0,0)
Please append a correct "root=" boot option; here are the available partions:
...
Kernel panic - not syncing: VFS: Unable to mount root fs on unknown-block(0,0)
Anyway.

make
make modules_install
cp arch/x86_64/boot/bzimage /boot/vmlinuz-3.7.10
cp System.map /boot/System-3.7.10.map
ln -s /boot/System-3.7.10.map /boot/System.map

The first step make took me 16 minutes, which isn't bad for a single-core compile.

While you don't have to (since we have a single / partition), you might as well do
emerge genkernel
genkernel --install initramfs
mv /boot/initramfs-genkernel-x86_64-3.7.10-gentoo /boot/initramfs-3.7.10

You can edit /etc/conf.d/modules and list the modules you want to load. Have a look at the output of lsmod to get an idea. Doing 'lsmod > modules.list' might be a good idea for troubleshooting later.

8. Miscellaneous

Edit /etc/fstab
/dev/sda1 / ext4 defaults 0 2 /dev/sda2 none swap sw 0 0

Set a hostname:
echo 'HOSTNAME="turbotux"' > /etc/conf.d/hostname
echo '127.0.0.1 turbotux localhost' > /etc/hosts

If you don't set a domain name and don't want hostname.unknown_domain to greet you on boot, run
sed -i 's,\\O,,g' /etc/issue

Edit /etc/conf.d/keymap and set keymap.

echo 'en_AU.UTF-8 UTF-8' >> /etc/locale.gen
locale-gen
echo 'LANG="en_AU.UTF-8"'> /etc/env.d/02locale
env-update
source /etc/profile

emerge mlocate vixie-cron sysklogd

rc-update add sshd default
emerge dhcpcd

9. GRUB2
GRUB might be a better, albeit retro, learning experience, but GRUB2 has better auto-configuration features and I'm not interested in hand-configuring grub just yet.
echo 'sys-boot/grub:2' >> /etc/portage/package.accept_keywords
emerge grub:2
mkdir /boot/grub2
grub2-mkconfig -o /boot/grub2/grub.cfg
grub2-install /dev/sda

IMPORTANT: set a root password before restarting or you won't be able to log in:
passwd

exit
shutdown -h now
Remove the CD from the virtual machine. Start the machine again

10. Your first boot
If all went well (i.e. you did exactly what I did above) you'll be greeted with this:

You can now log in as root.

11. Installing Gnome 2

The current version of gnome in gentoo (stable) is 2.32. If you want that, just emerge gnome. If not, the easiest (not safest) way to is switch to testing which might not be the best choice for gentoo novices.
To set up gnome I'm following this post: http://www.gentoo.org/doc/en/gnome-config.xml
If you can't live a single day without gnome 3, then checkout http://en.gentoo-wiki.com/wiki/Gnome_3

Anyway, gnome 2.32:

Then do
emerge --sync
emerge --update --ask world
emerge gentoolkit
equery m gnome

Brace yourself, because this will take a while (549 packages!):
emerge --ask --autounmask-write gnome
dispatch-conf
emerge --ask gnome

Hit Yes when you run the first command (change Use params), u (use new) when you run the second command, and Yes for the third command (emerge new packages). This step took 660 minutes in a virtual machine with a single core assigned.

env-update
source /etc/profile
emerge --sync
rc-update add dbus default
/etc/init.d/dbus start

Create a user:
useradd -m verahill
emerge sudo gksu
echo 'verahill ALL=(ALL) ALL'>>/etc/sudoers
passwd verahill
su verahill
cd ~

Continue setting up gnome:
echo 'export XDG_MENU_PREFIX=-gnome' > ~/.xinitrc
echo 'exec gnome-session' >> ~/.xinitrc
ln -s /etc/xdg/menus/gnome-applications.menu /etc/xdg/menus/applications.menu 
startx

You shouldn't have to do both the XDG_MENU_PREFIX and the symlink, but I had to in order to get a working applications menu.

Without vbox guest additions installed


To install the vbox additions, click on Devices/Install Guest Additions in the virtual machine menu. The CD will fail to mount.
sudo mount -o loop /dev/sr0 /mnt
sh /mnt/autorun.sh


Reboot, then do startx again. If you want gdm to start, then see step three here: http://www.gentoo.org/doc/en/gnome-config.xml

With vbox guest additions installed
Sounds is another story entirely...http://wiki.gentoo.org/wiki/PulseAudio

Anyway, that's enough of Gentoo for me for now.

12 March 2013

357. Annoying desktop experience -- zoneminder, nouveau, nvidia and other things

This isn't a how-to post. It's basically just a description of what I went through this morning -- hopefully it'll help someone. I don't like playing around with nvidia -- and I don't have time anyway -- so I won't try to ferret out exactly what went wrong. Maybe everything was due to me failing to discover that the upgrade hadn't finished properly.

So..
(the system in question was running nvidia/kernel 3.7 at the beginning)

I had issues starting virtualbox (playing with gentoo for an upcoming post) the other day, and so decided to reboot after running apt-get upgrade (I only do it once per week/month or so -- it's my futile attempt at stability in spite of running wheezy/testing...).

On rebooting everything looked fine and I was greeted with the login screen in GDM. Trying to log in everything looks fine at the beginning...the screen flickers as if the resolution is being changed, the desktop background looks fine, conky is running...and then I'm thrown back to the GDM login again.

I'm not a stranger to other desktops. Trying KDE, LXDE, etc via GDM gave the same error.

Looking in the terminal I noticed that I had guake segfault errors, and errors along the lines of
"segfault at 968 ip [..] error 4 in libX11.so.6.3.0"

Logging in as another user gives me a message saying that I'm thrown back in to gnome classic due to lack of acceleration. Also, the desktop didn't have menus etc., and with various d-bus related errors.

Looking at
~/.xsession-errors:
update-notifier: Fatal IO error 0 (Success) on X server :0.
No protocol specified
and
/var/log/Xorg.0.log:
Display does not support NVIDIA 3D.
I then ran SMXI with the intent to test Nouveau instead of Nvidia.

As part of its process, SMXI does a dist-upgrade. It's not often I encounter errors during apt-get, so when errors popped up, I paid attention.

Turns out that Zoneminder had some issue -- zoneminder had held back the configuration of packages that I pulled in during the apt-get upgrade at the very beginning. And given that I don't do it very often, there were a lot of packages that were left unconfigured, including Xorg.

I auto-remove zoneminder and completed the upgrade. So far so good!

If that had been the end of it there would be no blog post. Still things weren't working.

Since I was already exploring the possibility of switching to Nouveau, I decided to go through with it. First I backed up my old /etc/X11/xorg.conf which has served me well in the past. Then, using SMXI I installed Nouveau (after blacklisting nvidia, and removing any nouveau blacklisting).

GDM started up fine, but I had no acceleration and GNOME 3 started in fallback mode (gnome 'classic'). I tried glxgears which told me  libGL.so.1 was missing.

However, libGL.so.1 actually existed in /usr/lib/x86_64-gnu/ -- but it pointed to libGL.so.1.2 via a symlink, and libGL.so.1.2 didn't exist.

I flailed about for a little while:
sudo apt-get install --reinstall glx-alternative-mesa
Which seemed to actually do stuff -- pulled in nvidia-installer-cleanup, glx-diversions, glx-alternative-mesa. It added lots of seemingly relevant diversions, but there was still no target for the libGL.so.1 symlink.

I then got fed up with the Nouveau/GNOME 3 combination.

I decided to bet on NVIDIA again, and had the fairly reasonable idea that the issue was the updated Xorg version -- simple nvidia update might've helped

Since I had kernel 3.7 installed, and 3.8 supports NVIDIA/DKMS I figured I might as well install a 3.8 kernel I had compiled on a different computer before continuing.

After upgrading to kernel 3.8, I blacklisted nouveau in /etc/modprobe.d/blacklist.conf ('blacklist nouveau').
I manually made sure that there was no nvidia or nouveau loaded by rmmod:ing them and checking with lsmod.

I then ran smxi and installed debian-nvidia.

Reboot.

Black screen with cursor. No graphical environment.

lsmod showed that nouveau hadn't respected my blacklisting.

Edited my /etc/default/grub to read
GRUB_CMDLINE_LINUX_DEFAULT="quiet nouveau.blacklist=1"
then ran update-grub, followed by restoring my old xorg.conf.

And...then everything worked! lsmod shows that nouveau isn't loading anymore (blacklisting should be ok,  no?) and I can now log in to gnome 3 as normal with normal acceleration.

I'm not sure what the underlying problem was -- nouveau not respecting my blacklisting hasn't been an issue before, so that was a bit of a surprise. But it was probably fine before I installed nouveau (I can't uninstall it for some retarded reason since it pulls too many packages with it), and not the source of the original issues. Probably the new xorg version didn't play fine with the installed version of nvidia, which is almost expected.

I'm still peeved with the Nouveau/GNOME 3 situation though -- binary blobs shouldn't be required to simply to use a basic desktop. I can understand if nouveau isn't a stand in for nvidia -- it's a reverse engineered open source alternative after all -- but why is gnome 3 requiring so much grunt?

11 March 2013

356. Installing Office 2003 under Wine on Arch Linux

I did this in wine 1.5.25. Office 2003 is a bit trickier in Arch than in debian (http://verahill.blogspot.com.au/2013/01/307-installing-office-2003-in-wine-on.html)


1. First enable multilib in /etc/pacman.conf
96 97 [multilib] 98 SigLevel = PackageRequired 99 Include = /etc/pacman.d/mirrorlist 100

2. Install wine
pacman -S wine winetricks wine_gecko
WINEARCH=win32 winecfg
winetricks msxml3

Follow the instructions (i.e. download the msi file and put it in the right location)

3. Install Office
loop-mount your iso (or put in the CD)

sudo mkdir -p /media/cdrom
sudo chmod u+rwx /media/cdrom
chmod og+rx /media/cdrom
sudo mount -o loop OFFICE11.iso /media/cdrom
msiexec \i /media/cdrom/pro11.msi

Don't choose advanced customisation or the install will eventually fail. You can run 'wine control' later and click on 'Add/Remove programs' but unfortunately I don't seem to be able to actually get MS equation editor to install that way either.

I was hoping that 1.5.25 would work with Equation editor, but it didn't: http://bugs.winehq.org/show_bug.cgi?id=32697

05 March 2013

355. Compiling kernel 3.8.2 on Arch linux -- exploration

Edit: remove the sudo make install line -- it shouldn't be necessary and it triggers an error: 'cannot find LILO'

You can generate a good starting .config with make localconfig which creates a .config which prepares the modules which are in use by your system at that point. You can also get the old kernel config from /proc/config.gz which is probably a better approach.

I would guess that the approach described here is pretty much distro-agnostic.

Anyway, compiling the kernel:

mkdir ~/tmp
cd ~/tmp
wget http://www.kernel.org/pub/linux/kernel/v3.0/linux-3.8.2.tar.bz2
tar xvf linux-3.8.2.tar.bz2
cd linux-3.8.2/
cp /proc/config.gz .
gunzip config.gz
mv config .config
make oldconfig
make -j2
make -j2 modules
sudo make modules_install
sudo make headers_install INSTALL_HDR_PATH=/usr/src/linux-3.8.2
sudo cp arch/x86_64/boot/bzImage /boot/vmlinuz-3.8.2
sudo cp System.map /boot/System-3.8.2.map
sudo mkinitcpio -k 3.8.2-ARCH -c /etc/mkinitcpio.conf -g /boot/initramfs-3.8.2.img

NOTE: the naming isn't random. In order for grub-mkconfig to discover both the vmlinuz and initramfs files they need to be named vmlinuz-IDENTIFIER and initramfs-IDENTIFIER.img. The identifier can be anything.

Generate your grub.cfg:
sudo grub-mkconfig -o /boot/grub/grub.cfg

Reboot, and do
uname -a
Linux titanium 3.8.2 #1 SMP Mon Mar 4 20:17:17 EST 2013 x86_64 GNU/Linux

03 March 2013

354. Some Arch linux post-installation steps/observations

I decided to temporarily switch my laptop over to Arch linux while keeping all my other boxes running debian. Luckily I had an old HDD which had Windows XP and Ubuntu (after a long hiatus from playing with Fedora Core and Mepis I got serious with Hardy Heron) that I could use -- I nuked the ubuntu install but kept the XP install for...some reason.

Still under preparation: Item 20 (chrooted firefox)

Anyway, here are some of the post installation steps I went through and some of my observations. It might help the odd debian person who explores arch. These are in addition to cosmetic things like installing the frippery extensions and faenza icon set for GNOME.

Index
0. Home partition during installation
1. There's no update-grub in Arch
2. Thinkpad
3. Changing Wallpaper in gnome 3.6
4. Get gdm to autostart
5. Get guake and conky to autostart
6. Adding a windows partition to grub2
7. Mounting ntfs partition
8. Skype and wine
9. Dropbox
10. 'apt-file' on Arch
11. Finding foreign (AUR) packages
12. No texmaker
13. systemd and network interface names
14. Virtualbox
15. grub2 theme
16. BankID
17. Truecrypt and "Failed to set up a loop device"
18. Can boot via USB but not SATA --
      "unable to find root device"
19. Problems with Guake and transparency in new tabs


0. Home partition during installation
I've covered installation of arch before (e.g. here, here and here). To have a separate home, partition your disk accordingly, and install as normal. Don't make any user while in archchroot though. Instead, edit the /etc/fstab to include the home partition, and create the user on booting from the new arch install.

UUID=b59b7022-eda1-40b8-b1e0-ada3f172ba90 /home  ext4  defaults, user_xattr  0 0

1. There's no update-grub in Arch
Instead you use
grub-mkconfig -o /boot/grub/grub.cfg

It also means that e.g. any windows installations won't be auto-detected. See below for how to deal with that.

2. Thinkpad
To get the video working you need to install xf86-video-intel
To get the mouse pad working you need to install xf86-input-synaptics
Install lm_sensors and acpi and run sudo sensors-detect to set up temperature and fan speed sensors, and battery status (acpi).
The LEDs seem to work at times with tp_smapi. Not perfect.

Problems:
the mute button doesn't work (mute immediately followed volume down works), nor does mute mic. I've tried a lot of options but so far no luck.

3. Changing Wallpaper in gnome 3.6
The debian devs may think they are simplifying things, but are often making things more difficult to discover. To change wallpaper go to the gnome overview, open Background, and click on the wallpaper in the centre of the window. THAT brings up a list over installed wallpapers etc.

4. Get gdm to autostart
systemctl enable gdm

5. Get guake and conky to autostart
sudo cp /usr/share/applications/guake.desktop /etc/xdg/autostart/

Create /usr/share/applications/conky.desktop:
[Desktop Entry]
Encoding=UTF-8
Name=Conky
Comment=Conky
TryExec=conky
Exec=conky
Icon=conky
Type=Application
Categories=GNOME;GTK;System;Utility
StartupNotify=true
sudo cp /usr/share/applications/conky.desktop /etc/xdg/autostart/

6. Adding a windows partition to grub2
You'll need to edit or create something aking to /etc/grub.d/40_custom
menuentry "Microsoft Windows XP" {
    insmod part_msdos
    insmod ntfs
    insmod search_fs_uuid
    insmod ntldr\
    search --fs-uuid --set=root --hint-bios=hd0,msdos1 --hint-efi=hd0,msdos1 --hint-baremetal=ahci0,msdos1 B8AC3A4BAC3A0482
ntldr /ntldr
}
7. Mounting ntfs partition
sudo pacman -S ntfs-3g
sudo mkdir -p /media/winxp
sudo chown $USER /media/winxp

Edit /etc/fstab
UUID=B8AC3A4BAC3A0482 /media/winxp ntfs-3g noauto,uid=1000 0 0

8. Skype and wine
You need to edit /etc/pacman.conf and uncomment the multilib repos.
[multilib] SigLevel = PackageRequired Include = /etc/pacman.d/mirrorlist

sudo pacman -Syu
sudo pacman -S wine 
sudo pacman -S skype lib32-libpulse

I originally had a qt/qt4 conflict, but updating magically took care of that. Somehow.

NOTE that to get a useable 32 bit wine install you will need to specify this. See e.g. https://wiki.archlinux.org/index.php/Wine#Using_WINEARCH

9. Dropbox
You need to get dropbox and dropbox-nautilus from AUR. Create /etc/xdg/autostart/dropbox.desktop
[Desktop Entry] Encoding=UTF-8 Name=Dropbox daemon TryExec=dropboxd Exec=dropboxd Startupnotify=true

(I first tried systemctl enable dropbox@$USER but it didn't get nautilus running properly with dropbox. The method above works.)
10. 'apt-file' on arch
...is done with pkgfile.

sudo pacman -S pkgfile
pkgfile --update
pkgfile -s libXv.so.1

11. Finding foreign (AUR) packages.
AUR packages won't update themselves so you need to uninstall and rebuild each time. To find your AUR builds, do
pacman -Qm

12. No texmaker
Texmaker is in AUR and builds fine. It's also easy to build on your own, but installing it with pacman makes it easier to keep tabs on it.

13. systemd and network interface names
My network interfaces always end up with weird names in Arch (w5pls etc.). To manually name your interfaces create e.g. 70-persistent-net.rules in /etc/udev/rules.d/
SUBSYSTEM=="net", ACTION=="add", DRIVERS=="?*", ATTR{address}=="00:27:9e:27:9b:20", ATTR{dev_id}=="0x0", ATTR{type}=="1", KERNEL=="eth*", NAME="eth0" SUBSYSTEM=="net", ACTION=="add", DRIVERS=="?*", ATTR{address}=="00:23:fb:b3:d2:c8", ATTR{dev_id}=="0x0", ATTR{type}=="1", KERNEL=="wlan*", NAME="wlan0"

14.Virtualbox
sudo pacman -S virtualbox virtualbox-host-modules linux-headers
sudo usermod -G vboxusers -a $USER

To load the vboxdrv module manually do
sudo modprobe vboxdrv

To auto-load on boot do
sudo su
echo "vboxdrv">> /etc/modules-load.d/virtualbox.conf
exit 

To sort out dkms:
sudo pacman -S dkms virtualbox-host-dkms
sudo systemctl enable dkms
sudo dkms install vboxhost/4.2.8


15. grub2 theme
The stock grub2 startup screen in arch is a bit bland. To spice it up, install grub2-theme-archlinux from AUR.

Edit /etc/default/grub and add
GRUB_THEME="/boot/grub/themes/Archlinux/theme.txt"
Then do
sudo grub-mkconfig -o /boot/grub/grub.cfg

It looks a lot like the mockup here: http://xcracx.deviantart.com/art/Archlinux-Grub2-mockup-121231574

16. BankID

Install bankid via AUR:
wget https://aur.archlinux.org/packages/ne/nexuspersonal/nexuspersonal.tar.gz
tar xvf nexuspersonal.tar.gz
cd nexuspersonal
makepkg -s
sudo pacman -U nexuspersonal-4.19.1.11663-4-x86_64.pkg.tar.xz
sudo pacman -S nspluginwrapper firefox
sudo nspluginwrapper --install /usr/local/lib/personal/libplugins.so

It should now work under firefox. NOTE that in order to be able to test it using test.bankid.com you must change your useragent (see e.g. http://verahill.blogspot.com.au/2013/02/341-upgradinginstalling-bankid-on-64.html). However, it will work with e.g. skatteverket and sparbanken without changing the user agent.

17. Truecrypt and "Failed to set up a loop device"
The module loop isn't loaded. Either modprobe it, or make it load automatically on boot:
sudo su
echo "loop">> /etc/modules-load.d/loop.conf
exit

18. Arch won't boot -- "unable to find root device"
I could boot from the hdd when it was tethered via USB, but not when it was attached via a sata cable. The error was something along the lines of "unable to find root device".
I solved it by following this post. http://fanweiphysicist.blogspot.com.au/2012/02/unable-to-find-root-device-archlinux.html

19. Guake bug
On my laptop, with the xf86-video-intel drivers install, opening a new tab gives me a black background instead of a transparent one.
Not sure what the proper solution to this is, but when I set up an installation on another hdd and installed the f86-video-nv and ati drivers as well, I no longer had any issues with transparency.
(Long story short: I first installed Arch on a spinning 2.5" drive and used my laptop with it for a week. Satisfied that it worked well enough, I installed Arch to my SSD by tethering it via USB to a desktop with an external nvidia card and onboard ati graphics -- so I installed all three video drivers. Putting the hdd in the laptop, guake behaved as it should with proper transparency for all tabs. Not sure what the original issue was)

20. chrooted firefox -- in progress.
For now I've installed sandfox from AUR.

First of all, read this exchange to get a feel for the scope of chroots: http://kerneltrap.org/mailarchive/linux-kernel/2007/9/19/263398/thread#mid-263398. It's not perfect as a security tool, as it wasn't meant to be one. Having said that, security works in layers and this is one which is easy to implement and adds a little bit of security.

Chrooting a programme doesn't give you any privacy or prevents firefox from leaving traces (use an encrypted and anonymous tunnel and put the chroot in a truecrypt container to cover yourself a bit more).

sudo pacman -S devtools xorg-xhost
mkdir -p $HOME/tmp/jail
sudo mkarchroot $HOME/tmp/jail/arch64 base sudo firefox flashplugin
sudo chroot $HOME/tmp/jail/arch64
passwd
useradd -m sandbox
passwd sandbox
echo "sandbox ALL=(ALL) ALL" >> /etc/sudoers
echo 'export LC_ALL="C"'>>/etc/bash.bashrc
echo 'export LANG="C"'>>/etc/bash.bashrc
echo 'DISPLAY=:0.0' >> /etc/bash.bashrc
source /etc/bash.bashrc
exit

Launch the chroot with a script with something like this in it:
xhost +
sudo cp /etc/resolv.conf $HOME/tmp/jail/arch64/etc/resolv.conf
sudo mount -o bind /proc $HOME/tmp/jail/arch64/proc
sudo mount -o bind /sys $HOME/tmp/jail/arch64/sys
sudo mount -o bind /dev $HOME/tmp/jail/arch64/dev
sudo chroot $HOME/tmp/jail/arch64

You could also put 8.8.8.8 in resolv.conf (google dns).
Still not working properly (firefox segfaults)

353. Cygwin with octave and gnuplot on windows XP.

Here's my fourth Windows XP post.

Again, the goal is primarily to get Gnuplot and Octave working on Windows, together with sed, gawk and other tools for data processing. In this post that's done using cygwin on windows XP.

This is (in my opinion) a better alternative to installing the native gnuplot and octave packages (posts 350, 351, 352), especially as Octave in post 350 takes well over a minute to start, but only a few seconds through cygwin.

1. Download http://cygwin.com/setup.exe and run it. Set it to install from the internet, with c:\cygwin as the root directory. Pick a mirror which is reasonably close (e.g. mirror.aarnet.edu.au in Australia).

2. You're now asked to select packages.
Select octave (search for octave, click on 'skip' to change it to the version number), octave-forgegnuplot, xinit and xorg-server

3. Cygwin will calculate dependencies. cat, gawk, sed etc. are part of the base package and don't need to be explicitly selected.

I got a single error during installation, but it doesn't seem to have caused any obvious issues:
Package: libpango1.0_0 pango1.0.sh exit code 1
4. Launch Programs/Cygwin-X/XWin server.
Unblock if necessary.

Do
echo $DISPLAY
:0
to make sure that all is well. Run gnuplot and do e.g. 'plot x w lines' to make sure that all is working. Best thing? Octave only takes a few seconds to start... You may have to load packages in octave manually (e.g. 'pkg load all')


Links to this post:
http://blog.csdn.net/lllcfr1/article/details/8657143

352. Installing coreutils and sed, gawk on Windows (without cygwin)

My third Windows XP post. Only a few more to go...

You can also set up all these tools via cygwin: http://verahill.blogspot.com.au/2013/03/353-cygwin-with-octave-and-gnuplot-on.html

1. coreutils
coreutils covers a fair number of the basic linux file tools. In particular cat, paste and join are of interest with respect to data processing.

A. Go to http://sourceforge.net/projects/gnuwin32/files/coreutils/5.3.0/coreutils-5.3.0.exe/download?use_mirror=waix&download= and download coreutils-5.3.0.exe. Run the file.

B. Make sure to add C:\Program Files\GnuWin32\bin to the PATH:
* Right-click on my computer, select properties, Advanced.
* Click on Environment variables
* In the second box, 'system variables', highlight 'Path' and click on 'Edit'. In the variable value box, add ';C:\Program Files\GnuWin32\bin'

C. Go to the start meny, click on Run..., and type in 'cmd'
In the (fake) DOS window, type e.g. ls -lah to see if everything works.

2. gawk
Go to http://gnuwin32.sourceforge.net/packages/gawk.htm and open http://downloads.sourceforge.net/project/gnuwin32/gawk/3.1.6-1/gawk-3.1.6-1-setup.exe

Run the .exe and use the default installation location (which is the same as the coreutils above -- so you don't have to add a separate path). Run cmd and do e.g.

cat ntuser.ini|gawk "{print $2}"
S e t t i n g s ; T e m p o r a r y
3. sed
Sed is installed like gawk -- go to http://gnuwin32.sourceforge.net/packages/sed.htm and go to http://gnuwin32.sourceforge.net/downlinks/sed.php

Run the .exe file and install in the default location. Try e.g.

cat ntuser.ini|sed "s/e/E/g"

351. Installing gnuplot on Windows XP

Here's my second Win XP post.

Here's how to set up gnuplot on windows XP. You can also set it up using cygwin: http://verahill.blogspot.com.au/2013/03/353-cygwin-with-octave-and-gnuplot-on.html

1. Download
Go to http://www.tatsuromatsuoka.com/gnuplot/Eng/winbin/ and download http://www.tatsuromatsuoka.com/gnuplot/Eng/winbin/gp470-20120916-win32-mingw-setup.zip

You'll need e.g. 7zip to extract the file.

2. Install and set up
Extract the  gp470-20120916-mingw.exe file to some temporary place, and then launch the installation by double-clicking on it. Most installation steps are straight-forward. Set windows as the default terminal, and make sure to check the box to add the application directory to PATH.

3. Usage
Launch gnuplot from the windows start menu as any other program if you want it to run interactively.

Alternatively, create a script and launch it using "gnuplot scriptname" from cmd as you would under linux.

350. Installing GNU Octave on Windows XP

This is a Windows XP post (my first?), so right-thinking linux people can move on. Nothing to see here.

For the rest of you:
Since I can't force my students to switch to Linux -- but I can force the to use Octave and Gnuplot -- I need to make sure that there are some easy, step-by-step (recipe-based) guides available that describe how to install the tools that they are required to use on their platform of choice. OS X has many flaws, but has macports. Windows has cygwin, in addition to native builds of most GNU tools. I'll cover cygwin in a separate post.

Here's a pretty straightforward approach to installing GNU Octave and I've tested it on Windows XP. It suffers from a fatal weakness: it takes well over a minute (!) to actually start Octave this way -- each timeUse the cygwin approach insteadhttp://verahill.blogspot.com.au/2013/03/353-cygwin-with-octave-and-gnuplot-on.html -- this way it's about as fast as on Linux.

0. 7zip and notepad++
You'll need 7zip: http://www.7-zip.org/ and http://notepad-plus-plus.org/. Download and install.

1.  Download Octave
Go to http://wiki.octave.org/Octave_for_Windows
The most current version is 3.6.2 ("Octave-3.6.2-mingw + octaveforge pkgs"), which takes you here: http://downloads.sourceforge.net/project/octave/Octave%20Windows%20binaries/Octave%203.6.2%20for%20Windows%20MinGW%20installer/Octave3.6.2_gcc4.6.2_20120609.7z

2. Set up
The downloaded file is 169 Mb but extracts to 700 Mb(!) so even the extraction process takes a little while. Extract with 7zip by right-clicking the downloaded file, selecting 7zip, and extract to "Octave...".

Create C:\octave, and put the Octave3.6.2_gcc4.6.2 folder in it.

Right click on C:\octave\Octave3.6.2_gcc4.6.2\bin\octave.exe and select create shortcut. Copy the shortcut to e.g. your desktop. Edit it and click on change icon -- select "C:\Octave\Octave3.6.2_gcc4.6.2\share\octave\3.6.2\imagelib\octave-logo.ico".

3. Running
Simply double-click on the shortcut.
Here's the bad news: it takes 1 m 20 s to start, which is unacceptable.

4. Packages
To install packages without having a full build environment, download from
http://downloads.sourceforge.net/project/octave/Octave%20Windows%20binaries/Octave%203.6.2%20for%20Windows%20MinGW%20installer/Octave3.6.2_gcc4.6.2_pkgs_20120613.7z

Extract the file, and copy the bin, include, lib, share folders to c:\octave\Octave3.6.2_gcc4.6.2\ so that the folders merge with those from step 2.

Start octave and run
pkg rebuild -noauto nan

This way all packages (except nan) will auto-load next time you start octave.

01 March 2013

349. SGE: removed node while jobs were queued

The Problem
There's a cluster (running ROCKS with Sun Grid Engine) which I manage remotely and which I did not set up. Instead it was the IT people at that uni who first configured it. For some reason they named the nodes
compute-0-0.local
compute-0-1.local
compute-0-2.local
compute-0-3.local
compute-0-6.local
compute-0-7.local

Recently a few extra disks were added to the system, so all jobs were suspended. However, while installing the disks the local IT peep decided to change the node names without consulting us. Now the nodes were called

compute-0-0.local
compute-0-1.local
compute-0-2.local
compute-0-3.local
compute-0-4.local
compute-0-5.local

instead. Suddenly there were two node-queues with jobs in them, but with no corresponding nodes.Trying to delete the jobs in those queues only lead to:

all.q@compute-0-5.local        BIP   0/8/8          9.12     lx26-amd64    
   5142 0.55500 submit__v3 me         r     02/27/2013 15:02:11     8        
---------------------------------------------------------------------------------
all.q@compute-0-6.local        BIP   0/8/8          -NA-     lx26-amd64    auo
   5074 0.55500 submit__nb me         dr    02/02/2013 21:53:59     8      

The Solution
It wasn't immediately obvious how to fix this, but it turned out to be simple:
qconf -cq all.q@compute-0-6.local

That clears and deletes the queue. That's all.

28 February 2013

348. Using the official firefox 19 binary on debian testing/wheezy

UPDATE 20/3/2013: installing a system from scratch I'm having issues with xulrunner-10.0:i386, since it pulls in libstartup-notification0:i386 which causes all sorts of headaches (uninstalls xulrunner-10.0 and everything it depends on)

This post made me realise that installing the pre-built firefox binary isn't as straight-forward as one might like. A small nuisance is that the getfirefox.com versoin is only 32 bit, but that's life.

Here we go.

Download the standard binary version of firefox from here:
http://www.mozilla.org/en-US/firefox/new/?from=getfirefox

You can install it wherever you want, but I'm going for a local installation. Put the firefox-19.0.tar.bz2 in your home folder and untar it:
tar xvf firefox-19.0.tar.bz2
cd ~/firefox/
./firefox

If you get
bash: ./firefox: No such file or directory

then you are missing 32 bit compatibility libraries:
sudo dpkg --add-architecture i386
sudo apt-get update
sudo apt-get install ia32-libs
sudo apt-get install xulrunner-10.0:i386

To get flash set up you'll need the 32 bit version. Download the 32 bit version from http://get.adobe.com/flashplayer/?no_redirect

mkdir ~/.mozilla/plugins -p
mv ~/Downloads/install_flash_player_11_linux.i386.tar.gz ~/firefox
cd ~/firefox/
tar xvf install_flash_player_11_linux.i386.tar.gz
cp libflashplayer.so ~/.mozilla/plugins/libflashplayer.so

And that should leave you with a working firefox versions. Note that running 'firefox' as a command will invoke iceweasel if installed. To get around that you can e.g. do

echo "alias ffox='$HOME/firefox/./firefox'" >> ~/.bashrc
source ~/.bashrc

after which you can launch firefox by running ffox form the terminal. A standard installation would be to put everything in /opt and set up a .desktop file -- but there's plenty of guides to how to do that.

347. Minor ECCE oddity when pasting basis sets from BSE: lines longer than 254 chars wreak havoc

Using lines longer than 254 chars when editing nwchem input in ECCE leads to the rest of the input being dropped.

I discovered this when pasting basis sets from bse.pnl.gov. If you paste something which has a line longer than 254 chars, such as the one starting with # H He and ending with valence below (345 chars), everything that comes after that line will be dropped.
# Def2-SVP EMSL Basis Set Exchange Library 2/27/13 8:08 PM # Elements References # -------- ---------- # H He Li Be B C N O F Ne Na Mg Al Si P S Cl Ar K Ca Sc Ti V Cr Mn Fe Co Ni Cu Zn Ga Ge As Se Br Kr Rb Sr Y Zr Nb Mo Tc Ru Rh Pd Ag Cd In Sn Sb Te I Xe Cs Ba La Hf Ta W Re Os Ir Pt Au Hg Tl Pb Bi Po At Rn : F. Weigend and R. Ahlrichs, Phys. Chem. Chem. Phys., Balanced basis sets of split valence, triple zeta valence and quadruple zeta valence # quality for H to Rn: Design and assessment of accuracy 7, 3297 (2005). # BASIS "ao basis" PRINT #BASIS SET: (4s,1p) -> [2s,1p] H S 13.0107010 0.19682158E-01 1.9622572 0.13796524 0.44453796 0.47831935 H S 0.12194962 1.0000000 H P 0.8000000 1.0000000 #BASIS SET: (7s,4p,1d) -> [3s,2p,1d] O S 2266.1767785 -0.53431809926E-02 340.87010191 -0.39890039230E-01 77.363135167 -0.17853911985 21.479644940 -0.46427684959 6.6589433124 -0.44309745172 O S 0.80975975668 1.0000000 O S 0.25530772234 1.0000000 [..]

To reproduce, set up a calculation. In the editor, click on 'Final Edit'. Now paste your basis set. Save and exit (it's vi/m, so that means using :wq). 

Everything seems to be fine

Now, either select the job and hit Ctrl+I to see the input, or open the editor and click on 'Final Edit' again.

Nothing below the line immediately preceding the long line will be saved. It's not a visualisation issue either -- if you launch the job and do ctrl+o to see what NWChem received as input, it mirrors what you see as input.

Pasting anything other than that overly long line works fine.


A more artificial example would be to try to save this
a
b
abcdefghijklmnopqrstuvxyzabcdefghijklmnopqrstuvxyzabcdefghijklmnopqrstuvxyzabcdefghijklmnopqrstuvxyzabcdefghijklmnopqrstuvxyzabcdefghijklmnopqrstuvxyzabcdefghijklmnopqrstuvxyzabcdefghijklmnopqrstuvxyzabcdefghijklmnopqrstuvxyzabcdefghijklmnopqrstuvxyz1234
d
e

which works, vs this:
a
b
abcdefghijklmnopqrstuvxyzabcdefghijklmnopqrstuvxyzabcdefghijklmnopqrstuvxyzabcdefghijklmnopqrstuvxyzabcdefghijklmnopqrstuvxyzabcdefghijklmnopqrstuvxyzabcdefghijklmnopqrstuvxyzabcdefghijklmnopqrstuvxyzabcdefghijklmnopqrstuvxyzabcdefghijklmnopqrstuvxyz12345
d
e

which doesn't. There's a difference of one character.

27 February 2013

346. Tripwire -- keeping an eye on important files

The whole UEFI/Secure Boot debacle lead me to this post: http://arstechnica.com/information-technology/2013/02/linus-torvalds-i-will-not-change-linux-to-deep-throat-microsoft/

In the comments section 'rhavenn' wrote this in passing: " ...by taking a SHA512 hash of your kernel, offloading that to a 3rd party and occasionally verifying the hash. It's nothing tripwire or any other software hasn't been doing for ages. "

Which lead me to check if tripwire was in the debian repos -- and it is.
UPDATE: You can also checkout 'aide' which is also in the repos.

Given how I use my work computers I'm more concerned with disk corruption than infection by malicious code, but as someone who goes through the occasional airport, and with it the potential risk of having to hand over my laptop (never happened so far), I do see a the use for tripwire. Also, in spite of the almost complete lack of viruses in the wild for linux, one should never be complacent (just look at OS X). Besides, learning new things is always a good thing.

Although to be fair, what tripwire does is what most (decent) antivirus programs also do.

Here's how to get set up with tripwire.


Installation

sudo apt-get install tripwire

You'll be asked to answer a series of questions:

Tripwire uses a pair of keys to sign various files, thus ensuring their unaltered state. By acceptin here, you will be prompted for the passphrase for the first of those keys, the site key, during the installation. You are also agreeing to create a site key if one doesn't exist already. Tripwire uses the site key to sign files that may be common to multiple systems, e.g. the configuration & policy files. See twfiles(5) for more information. Unfortunately, due to the Debian installation process, there is a period of time where this passpgrase exists in an unencrypted format. Were an attacker to have access to your machine during this period, he could possibly retrieve your passphrase and use it at some later point. If you would rather not have this exposure, decline here. You will then need to create a site key, configuration file & policy file by hand. See twadmin(8) for more information. Do you wish to create/use your site key passphrase during installation?
Tripwire keeps its configuration in a encrypted database that is generated, by default, from /etc/tripwire/twcfg.txt Any changes to /etc/tripwire/twcfg.txt, either as a result of a change in this package or due to administrator activity, require the regeneration of the encrypted database before they will take effect. Selecting this action will result in your being prompted for the site key passphrase during the post-installation process of this package. Rebuild Tripwire configuration file?
Tripwire uses two different keys for authentication and encryption of files. The site key is used to protect files that could be used across several systems. This includes the policy and configuration files. You are being prompted for this passphrase either because no site key exists at this time or because you have requested the rebuilding of the policy or configuration files. Remember this passphrase; it is not stored anywhere! Enter site-key passphrase:
Tripwire uses two different keys for authentication and encryption of files. The local key is used to protect files specific to the local machine, such as the Tripwire database. The local key may also be used for signing integrity check reports. You are being prompted for this passphrase because no local key file currently exists. Remember this passphrase; it is not stored anywhere! Enter local key passphrase:
Tripwire has been installed The Tripwire binaries are located in /usr/sbin and the database is located in /var/lib/tripwire. It is strongly advised that these locations be stored on write-protected media (e.g. mounted RO floppy). See /usr/share/doc/tripwire/README.Debian for details.

Initialise the database:
sudo tripwire -m i
Please enter your local passphrase: 
Parsing policy file: /etc/tripwire/tw.pol
Generating the database...
*** Processing Unix File System ***
[..]
### Warning: File system error.
### Filename: /proc/30401/task/30401/fdinfo/4
### No such file or directory
### Continuing...
[..]
The object: "/proc/fs/nfsd" is on a different file system...ignoring.
The object: "/proc/sys/fs/binfmt_misc" is on a different file system...ignoring.
[..]
Wrote database file: /var/lib/tripwire/beryllium.twd
The database was successfully generated.

Checking a single file:
sudo tripwire -m c /bin/ls
Integrity checking objects specified on command line...
Wrote report file: /var/lib/tripwire/report/beryllium-20130227-141840.twr


Open Source Tripwire(R) 2.4.2.2 Integrity Check Report

Report generated by:          root
Report created on:            Wed Feb 27 14:18:40 2013
Database last updated on:     Never

===============================================================================
Report Summary:
===============================================================================

Host name:                    beryllium
Host IP address:              192.168.1.1
Host ID:                      None
Policy file used:             /etc/tripwire/tw.pol
Configuration file used:      /etc/tripwire/tw.cfg
Database file used:           /var/lib/tripwire/beryllium.twd
Command line used:            tripwire -m c /bin/ls 

===============================================================================
Rule Summary: 
===============================================================================

-------------------------------------------------------------------------------
  Section: Unix File System
-------------------------------------------------------------------------------

  Rule Name                       Severity Level    Added    Removed  Modified 
  ---------                       --------------    -----    -------  -------- 
  Root file-system executables    100               0        0        0        
  (/bin)

Total objects scanned:  1
Total violations found:  0

===============================================================================
Object Summary: 
===============================================================================

-------------------------------------------------------------------------------
# Section: Unix File System
-------------------------------------------------------------------------------

No violations.

===============================================================================
Error Report: 
===============================================================================

No Errors

-------------------------------------------------------------------------------
*** End of report ***

Open Source Tripwire 2.4 Portions copyright 2000 Tripwire, Inc.
Integrity check complete.

As a cronjob:
You can also just run
sudo tripwire -m c
in which case your system will be checked.

I would guess that putting this as a cronjob to run once per week would be the intended way of using tripwire. Edit /etc/crontab and put
0 22 * * 7 root tripwire -m c

Update: Tripwire on debian puts a file in /etc/cron.daily

26 February 2013

345. Replacing gEdit with Kate

For some reason I can't get gEdit to auto-spellcheck as I type anymore. There's simply no option to do it. Funnily enough, my favourite editor vim does it without any issues -- but while I like vim and use it for most of my data processing, I prefer to edit e.g. html in gEdit. Habit, I suppose.

Anyway, while gEdit is great for everything else, it's given me an excuse to familiarise myself a bit more with Kate which I take is the KDE counterpart to gEdit. A counterpart that's on steroids like a lot of KDE applications (that's not necessarily a good thing -- see e.g. vim vs emacs -- but each to their own)

Another cool thing with kate is that you can run it in a vim compatibility mode. (Sure, there's also gVim for the real deal, but gVIM looks ugly on my computer and I'm a shallow person.)

1. Installation
sudo apt-get install kate

2. Associations
Edit ~/.local/share/applications/defaults.list
 text/plain=kate.desktop
 text/x-python=kate.desktop
 text/x-sql=kate.desktop
 text/html=kate.desktop
 text/dat=kate.desktop
 text/xml=kate.desktop

You can associate kate with as many formats are you want this way.

Create ~/.local/share/applications/kate.desktop
[Desktop Entry]
Name=kate
Comment=kate text editor
Exec=/usr/bin/kate
Type=Application
Categories=Office;Accessories;
Set dynamic word wrap, enable vim, override

3. Desktop
In gnome, either navigate through your menu to 'Main Menu' (under 'system tools') or, if you're running a stock gnome 3 without a menu, go to the overview mode (what you end up with when you put the mouse in the top left corner) and type in main menu.

Either way, go to accessories and tick the box next to Kate.

4. Set up kate
Start kate, go to settings, configure kate and set your defaults:
Enable vi mode

Set up automatic spell check

Activate Dynamic Word Wrap

And enjoy:


24 February 2013

344. Compile a kernel (3.8) without using kpkg

Note: There is a much better and easier way: http://verahill.blogspot.com.au/2013/02/342-compiling-kernel-38-on-debian.html . What follows is just done for the sake of exploration.

Post begins:
It is incredibly easy to compile your own kernel on Debian using kernel-package. See e.g. http://verahill.blogspot.com.au/2013/02/342-compiling-kernel-38-on-debian.html

In the interest of learning how to compile a kernel in a more generic way which is applicable to non-debian systems (arch, red hat etc.), here's a method which doesn't rely on kpkg (kernel-package).

The downside is that this method does not produce a set of .deb files, and that you can't uninstall it using apt.

I'll be brief since most things are covered e.g. here.  I looked at this post when writing this.

sudo apt-get install build-essential ncurses-bin
mkdir ~/tmp
cd ~/tmp
wget http://www.kernel.org/pub/linux/kernel/v3.0/linux-3.8.tar.bz2
tar xvf linux-3.8.tar.bz2
cd linux-3.8/
cat /boot/config-`uname -r`>.config
make oldconfig

Once you're done answering the questions, do

time make -j3

This takes 29 minutes (AMD Athlon II X3).

time make -j3 modules

This takes 4 minutes. Finish by running

sudo make modules_install
sudo make headers_install INSTALL_HDR_PATH=/usr/src/linux-3.8.0
sudo make install

Note that the default path for the headers is /usr/include, which doesn't play well with most programs that check for the presence of headers before installation, so use INSTALL_HDR_PATH to specify the destination (at least on debian).

make install takes care of initramfs and grub-update as well and generates
/boot/config-3.8.0
/boot/initrd.img-3.8.0
/boot/System.map-3.8.0
/boot/vmlinuz-3.8.0
And that's really it -- compiling a kernel even without kernel-packages is pretty easy. Reboot and everything should be in working order.

23 February 2013

343. 'track changes' in LaTeX: collaborative writing

While I find latex superior to word processors in almost every single aspect, there is one thing I have to admit that MS/Libre/Open Office have over LaTeX: track changes. Since LaTeX is nothing but code you can obviously use something like git or svn to manage versions of .tex code. There are some differences though -- e.g. git would show you the diff output, but not necessarily the context of the changes, and I'm having a difficult enough time convincing people to use LaTeX without having to worry about setting up a git server as well (I can obviously cheat around it by running a local git server, downloading their file and push it to my git server etc, but then I would be the only one who'd be able to track the changes. Also, it's not elegant).

I have a student who is currently preparing a thesis, and while I've managed to give most of my feedback via the pdf annotation function in mendeley, it doesn't feel natural when it should be a simple matter of editing the .tex directly (yet in a way that leaves the student in control over whether to accept or reject the changes).

So here's an exploration of three different ways of passing comments and corrections back and forth when using LaTeX.

I'm also not the first one to ask this question. See e.g. http://tex.stackexchange.com/questions/3653/what-is-the-best-way-to-track-changes-with-non-computer-people

1. Make a pdf and annotate it
 This is a simple and straightforward method for passing comments back and forth. It is not a very convenient method for making any substantial changes though. On top of that, linux does not currently have any particularly useful program for annotating pdf files. See here: http://verahill.blogspot.com.au/2013/02/338-annotating-pdfs-in-linux-revisited.html for more information.

Quite apart from the lack of tool, I really want to emphasize that making small annotations is not a replacement for a tool that allows you to really stir up the text.

2. Using git
You can easily set up your own git server and use that for versioning. http://verahill.blogspot.com.au/2013/01/324-setting-up-private-git-server.html

You can see the version differences using a couple of methods, but gitk might be the easiest one. The downside with this is that you lose some of the context of the changes. Also, it shows you the code that was changed, the changes in the final document (e.g. formatting, figures etc.).

Still it's a pretty intuitive and easy way of tracking changes -- and in terms of versioning it is certainly the best solution. You can fork, roll back and generally have a perfect account of how the document has evolved.
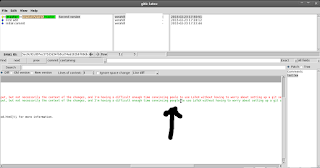
git in particular makes it easy to see added code

In terms of small changes like fixing typos it is a lot more subtle though


3. latexdiff
latexdiff is an easy to use tool that's in the debian repos. Simply do
latexdiff version1.tex version2.tex > diff.tex

and then open diff.tex and compile it to see the changes.

Pleasantly suprised


4. Other solutions
there are plenty of solutions for introducing mark-up directly into the tex document, like trackchanges, changes etc. I've used them in the past but it lack elegance when doing heavier collaborative writing.

Thoughts

I can't help but think that the best solution is to combine git with latexdiff -- or even a special fork of git that uses latexdiff.

Googling shows that apparently I"m not the only one who thinks so: http://gitorious.org/git-latexdiff#more as well as http://tex.stackexchange.com/questions/1325/using-latexdiff-with-git
I haven't actually tested any of those methods yet, and it still more or less requires a common git server.

20 February 2013

342. Compiling Kernel 3.8 on Debian Testing/Wheezy

NOTE: It seems like series 3.8 has issues with intel (i915) graphics -- it occasionally generates kworker threads that causes unresponsiveness as seen by slow mouse and keyboard response when e.g. plugging or unplugging mains power. No issues on e.g. nvidia though.
http://verahill.blogspot.com.au/2013/03/368-slow-mouse-and-keyboard-triggered.html
http://forums.gentoo.org/viewtopic-p-7278760.html
https://bbs.archlinux.org/viewtopic.php?pid=1248190

Post:

Kernel 3.8 is out now. Not much to say -- the compilation works well using the standard method. The compressed kernel is about 81 Mb to download.

The approach below shows how to compile the kernel on Debian. If you're interested in a more generic approach, see this post: http://verahill.blogspot.com.au/2013/02/344-compile-kernel-38-without-using-kpkg.html

NOTE: kernel 3.8 -- in contrast to the 3.7 series -- now compiles fine on AMD FX 8150.

NOTE: kernel 3.8 plays well with nvidia dkms

Here we go:
sudo apt-get install kernel-package fakeroot build-essential ncurses-dev
mkdir ~/tmp
cd ~/tmp
wget http://www.kernel.org/pub/linux/kernel/v3.0/linux-3.8.tar.bz2
tar xvf linux-3.8.tar.bz2
cd linux-3.8/
cat /boot/config-`uname -r`>.config
make oldconfig

You will be asked a lot of questions -- how many depends on what version you upgrade from. If in doubt, pick the default answer (i.e. hit enter). If really in doubt, use google.

Then continue:
make-kpkg clean

Do
make menuconfig

if you want to make any specific changes to the kernel (e.g. add support for certain devices)

Then continue:
time fakeroot make-kpkg -j4 --initrd kernel_image kernel_headers

As usual 4 is the number of threads you wish to launch -- make it equal to the number of cores that you have for optimum performance during compilation (more about that here).

The build takes around 20 minutes on a four-core intel i5-2400 with -j4, and 14 minutes on an fx-8150 with -j8 (96 minutes with -j1).

Install:
sudo dpkg -i ../linux-image-3.8.0_3.8.0-10.00.Custom_amd64.deb ../linux-headers-3.8.0_3.8.0-10.00.Custom_amd64.deb

New stuff/Questions:


Offload RCU callback processing from boot-selected CPUs (RCU_NOCB_CPU) [N/y/?] (NEW) *
Memory placement aware NUMA scheduler (NUMA_BALANCING) [N/y/?] (NEW) *
Enable to assign a node which has only movable memory (MOVABLE_NODE) [N/y/?] (NEW)
Allow for memory hot-add (MEMORY_HOTPLUG) [Y/n] y
Allow for balloon memory compaction/migration (BALLOON_COMPACTION) [Y/n/?] (NEW)
Set default setting of cpu0_hotpluggable (BOOTPARAM_HOTPLUG_CPU0) [N/y/?] (NEW
Debug CPU0 hotplug (DEBUG_HOTPLUG_CPU0) [N/y/?] (NEW)
ACPI tables can be passed via uncompressed cpio in initrd (ACPI_INITRD_TABLE_OVERRIDE) [N/y/?] (NEW)
Support multiple cpuidle drivers (CPU_IDLE_MULTIPLE_DRIVERS) [N/y/?] (NEW)
"NOTRACK" target support (DEPRECATED) (NETFILTER_XT_TARGET_NOTRACK) [N/m] (NEW

Default SCTP cookie HMAC encoding
  > 1. Enable optional MD5 hmac cookie generation (SCTP_DEFAULT_COOKIE_HMAC_MD5) (NEW)
    2. Enable optional SHA1 hmac cookie generation (SCTP_DEFAULT_COOKIE_HMAC_SHA1) (NEW)
    3. Use no hmac alg in SCTP cookie generation (SCTP_DEFAULT_COOKIE_HMAC_NONE) (NEW)
  choice[1-3?]:   Enable optional MD5 hmac cookie generation (SCTP_COOKIE_HMAC_MD5) [Y/?] (NEW) y

Enable optional SHA1 hmac cookie generation (SCTP_COOKIE_HMAC_SHA1) [N/y/?] (NEW) *
Enable optional MD5 hmac cookie generation (SCTP_COOKIE_HMAC_MD5) [Y/?] (NEW) y
Distributed ARP Table (BATMAN_ADV_DAT) [N/y/?] (NEW)
Kvaser CAN/USB interface (CAN_KVASER_USB) [N/m/?] (NEW)
LSI MPT Fusion SAS 3.0 Device Driver (SCSI_MPT3SAS) [N/m/?] (NEW)
Chelsio Communications FCoE support (SCSI_CHELSIO_FCOE) [N/m/?] (NEW) *
Marvell 88E6060 ethernet switch chip support (NET_DSA_MV88E6060) [N/m/y/?] (NEW)
Marvell 88E6085/6095/6095F/6131 ethernet switch chip support (NET_DSA_MV88E6131) [N/m/y/?] (NEW)
Marvell 88E6123/6161/6165 ethernet switch chip support (NET_DSA_MV88E6123_61_65) [N/m/y/?] (NEW) *
Cadence devices (NET_CADENCE) [Y/n/?] (NEW)
AT91RM9200 Ethernet support (ARM_AT91_ETHER) [N/m/y/?] (NEW)
Cadence MACB/GEM support (MACB) [N/m/y/?] (NEW)
Broadcom devices (NET_VENDOR_BROADCOM) [Y/?] y
Marvell MDIO interface support (MVMDIO) [N/m/y/?] (NEW)
CDC MBIM support (USB_NET_CDC_MBIM) [N/m/?] (NEW)
Atheros Wireless Cards (ATH_CARDS) [N/m/?] (NEW)
Atheros AR5523 wireless driver support (AR5523) [N/m/?] (NEW)
Wilocity 60g WiFi card wil6210 support (WIL6210) [N/m/?] (NEW) *
Realtek RTL8723AE PCIe Wireless Network Adapter (RTL8723AE) [N/m/?] (NEW)
ARC UART driver support (SERIAL_ARC) [N/m/y/?] (NEW) *
CBUS I2C driver (I2C_CBUS_GPIO) [N/m/?] (NEW)
TS-5500 DIO blocks and compatibles (GPIO_TS5500) [N/m/y/?] (NEW) 
TI BQ2415x battery charger driver (CHARGER_BQ2415X) [N/m/?] (NEW)
Board level reset or power off (POWER_RESET) [N/y/?] (NEW) *

 Default Thermal governor
  > 1. step_wise (THERMAL_DEFAULT_GOV_STEP_WISE) (NEW)
    2. fair_share (THERMAL_DEFAULT_GOV_FAIR_SHARE) (NEW)
    3. user_space (THERMAL_DEFAULT_GOV_USER_SPACE) (NEW)
  choice[1-3?]:   Fair-share thermal governor (FAIR_SHARE) [N/y/?] (NEW)

Step_wise thermal governor (STEP_WISE) [Y/?] (NEW) y
User_space thermal governor (USER_SPACE) [N/y/?] (NEW)
SSB GPIO driver (SSB_DRIVER_GPIO) [N/y/?] (NEW) *
BCMA GPIO driver (BCMA_DRIVER_GPIO) [N/y/?] (NEW)
Support for Realtek PCI-E card reader (MFD_RTSX_PCI) [N/m/y/?] (NEW)
TI ADC / Touch Screen chip support (MFD_TI_AM335X_TSCADC) [N/m/y/?] (NEW)
Support for Nano River Technologies Viperboard (MFD_VIPERBOARD) [N/m/?] (NEW)
Support for Retu multi-function device (MFD_RETU) [N/m/?] (NEW) *
Maxim MAX8973 voltage regulator  (REGULATOR_MAX8973) [N/m/?] (NEW)
TI TPS51632 Power Regulator (REGULATOR_TPS51632) [N/m/?] (NEW)
Siano SMS1xxx based MDTV receiver (SMS_USB_DRV) [N/m/?] (NEW)
Siano SMS1xxx based MDTV via SDIO interface (SMS_SDIO_DRV) [N/m/?] (NEW)   *
Stanton Control System 1 MIDI (SND_SCS1X) [N/m/?] (NEW) *
ION iCade arcade controller (HID_ICADE) [N/m/?] (NEW)
HID over I2C transport layer (I2C_HID) [N/m/?] (NEW) *
Renesas R-Car USB phy support (USB_RCAR_PHY) [N/m/?] (NEW)   *
SDHCI support for ACPI enumerated SDHCI controllers (MMC_SDHCI_ACPI) [N/m/?] (NEW)
NXP PCF8523 (RTC_DRV_PCF8523) [N/m/?] (NEW)
Philips PCF8563/Epson RTC8564 (RTC_DRV_PCF8563) [M/n/?] m
Userspace platform driver with generic irq and dynamic memory (UIO_DMEM_GENIRQ) [N/m/?] (NEW)
Microsoft Hyper-V Balloon driver (HYPERV_BALLOON) [N/m/?] (NEW) *
SystemBase PCI Multiport UART (SB105X) [N/m/y/?] (NEW)
TTY over Firewire (FIREWIRE_SERIAL) [N/m/?] (NEW) *
F2FS filesystem support (EXPERIMENTAL) (F2FS_FS) [N/m/y/?] (NEW) *
Enable CIFS debugging routines (CIFS_DEBUG) [Y/n/?] (NEW)
Simplified Mandatory Access Control Kernel Support (SECURITY_SMACK) [N/y/?] (NEW)
Camellia cipher algorithm (x86_64/AES-NI/AVX) (CRYPTO_CAMELLIA_AESNI_AVX_X86_64) [N/m/y/?] (NEW)


Links to this post:
http://forum.notebookreview.com/lenovo/575569-linux-x220-41.html
http://www.reddit.com/r/CrunchBang/comments/196zx5/whats_the_best_way_to_install_a_new_kernel_in/
http://www.lubuntu.ru/forum/viewtopic.php?t=1125
http://forums.linuxmint.com/viewtopic.php?f=143&p=711457
https://www.linux.org.ru/forum/linux-install/9128362
http://stackoverflow.com/questions/16573913/compile-new-kernel-on-debian-wheezy
http://crunchbang.org/forums/viewtopic.php?id=26825
http://mygoodluck.org/debian-obnovil-yadro-do-38

19 February 2013

341. Upgrading/installing BankID on 64 bit linux

Note: the post below is aimed at installing BankID on Debian (should be ok for ubuntu/mint too). For Arch Linux, see here (item 16)

There are a few ways to get around the rotten behaviour of bankid. This is one of them:

NOTE: to install nspluginwrapper you need to enable the stable/squeeze repos by e.g. adding
deb http://ftp.au.debian.org/debian/ squeeze main contrib non-free
to your /etc/apt/sources.list.

That's normally reasonably safe since apt by default pulls in the newest package and I haven't had any issues. Just be careful though.

You can also install nspluginwrapper by compiling it as shown here: http://verahill.blogspot.com.au/2013/03/366-nspluginwrapper-on-debian.html


Note that there's a FOSS alternative in Fribid (http://verahill.blogspot.se/2012/02/debian-testing-wheezy-64-fribid-as.html) which seems to be working perfectly -- and if you can use it, use it. The main limitation is that in practice you'll have to collect your certificate/ID with it, since newer versions of BankID saves the ID in an incompatible format. Like many foreigners, I don't have the opportunity to visit Sweden for the sole sake of picking up a new ID, so I'm stuck with BankID. But you may not be.


0. Things to install:
sudo apt-get install iceweasel nspluginwrapper ia32-libs

1. Download BankID and uninstall any previous installations
cd ~/Downloads
mkdir bankid
cd bankid
wget https://install.bankid.com/Download?defaultFileId=Linux -O bankid.tar.gz
tar xvf bankid.tar.gz
cd BISP-4.19.1.11663/
sudo sh install.4.19.1.11663.sh u

2. If you're upgrading, make sure to remove any previous libplugins.so
sudo updatedb && locate libplugins.so
/home/me/Downloads/bankid/BISP-4.19.1.11663/libplugins.so /usr/lib/mozilla/plugins/libplugins.so /usr/lib/mozilla/plugins/npwrapper.libplugins.so /usr/lib/nspluginwrapper/plugins/npwrapper.libplugins.so
sudo nspluginwrapper -r /usr/lib/mozilla/plugins/npwrapper.libplugins.so sudo rm /usr/lib/mozilla/plugins/libplugins.so sudo rm /usr/lib/nspluginwrapper/plugins/npwrapper.libplugins.so

3. Install the new version
sudo sh install.4.19.1.11663.sh i
Installing BankID Security Application ln: failed to create symbolic link `/usr/lib/firefox-addons/plugins': No such file or directory WARNING: Failed installing plugin for Firefox 3. Manually add symlink to libplugins.so in your Firefox 3 plugin directory if this browser is to be used. Installation complete.
sudo nspluginwrapper --install /usr/local/lib/personal/libplugins.so

4. Test your installation
Don't bother with test.bankid.com since the idiots won't let you test anything that identifies itself as 64 bit (more about that later). Instead
5. Testing against test.bankid.com
Everything is in working order but for some idiotic reason bankid.com won't even allow you to test you fancy new 64 bit installation -- and it all boils down the useragent string in iceweasel/firefox identifying itself as running on a 64 bit system (paradoxically, a real 32 bit browser running in a chroot won't work either since the kernel is 64 bit -- in schroot you can use personality=linux32 to get around it, but good luck dealing with the massive memory leaks).

Anyway,
  • open your iceweasel browser
  • type in about:config in the address bar
  • promise that you'll be careful
  • right-click on the page, select New, String
  • In the first box, type general.useragent.override
  • In the second box paste Mozilla/5.0 (X11; Linux i686; rv:10.0.12) Gecko/20100101 Firefox/10.0.12 Iceweasel/10.0.12
You can now go to https://test.bankid.com. I find this a bit humiliating though, and you can use bankid everywhere but bankid.com without having to set the useragent to identify your system as being i686.


If you're having issues, the first thing to check is about:plugins in firefox: